COPYRIGHT, PLEASE NOTE
Sunday, October 26, 2025
ICARUS, a two frame vertical panorama
In this image, I have combined my new shot of the Witch’s Broom Nebula with my recent photo “ICARUS, the Final Flight” to form a two-frame mosaic. I love discovering fresh compositions from well-known targets — in this case, the beautiful Veil Nebula supernova remnant.
Click for a large image, 1500 x 3600 pixels
Click for a large image, 2000 x 2500 pixels
The area of interest is marked as a white rectangle
O-III, 9x 1200 s, binned 1x1 = 16h
Tuesday, October 14, 2025
Western Veil nebula, the Witch's Broom
This is my first-light image for the autumn season 2025.
I collected a total of 34 hours of exposure time over a period of about two months for this two-frame mosaic. The seeing conditions were relatively good for my location, with FWHM values ranging between 1.6 and 2.5 throughout the sessions.
Witch's Broom Nebula
Click for a large image, 3500 x 1800 pixels
 A mapped color image from a light emitted by an ionized elements, sulfur=red, hydrogen=green and oxygen=blue. The resolution of the photo is reduced for the web usage.
Witch's Broom Nebula, O-III emission alone
Click for a large image, 3500 x 1800 pixels
The Veil Nebula supernova remnant in constellation Cygnus.
The area of interest is marked as a white rectangle
Technical details
O-III, 6x 1200 s, binned 1x1 = 13
Thursday, February 6, 2025
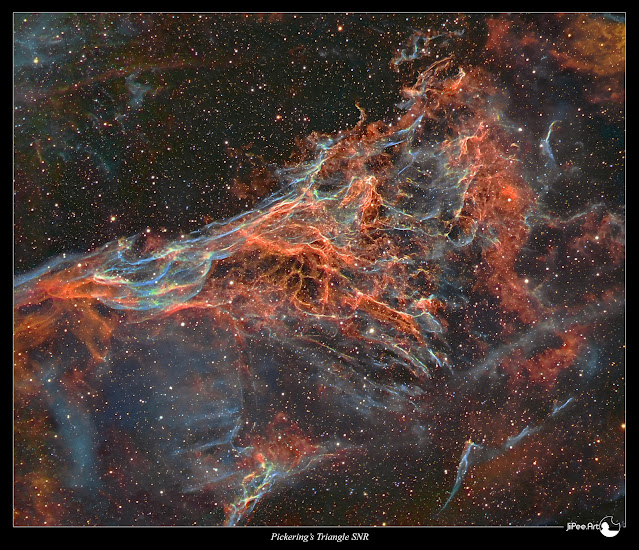
Pickering's Triangle, Resurrection
This is not exactly a new image of Pickering's Triangle, but it is a completely new revision of it. I have photographed this complex-looking region of the Veil Nebula supernova remnant in Cygnus multiple times over the decades. In this latest revision, I have gathered all my exposures of the target and combined them into a new, most detailed version yet.
PICKERING'S TRIANGLE RESURRECTION
Click for a full size, 2700x2300 pixels
sulfur=red, hydrogen=green and oxygen=blue
Click for a full size, 2000x2000 pixels

Visual color version of Sh2-115 glows mostly in red from a light emitted by an ionized elements,
sulfur=red, hydrogen=red and oxygen=blue, this combination is very close to a natural color palette
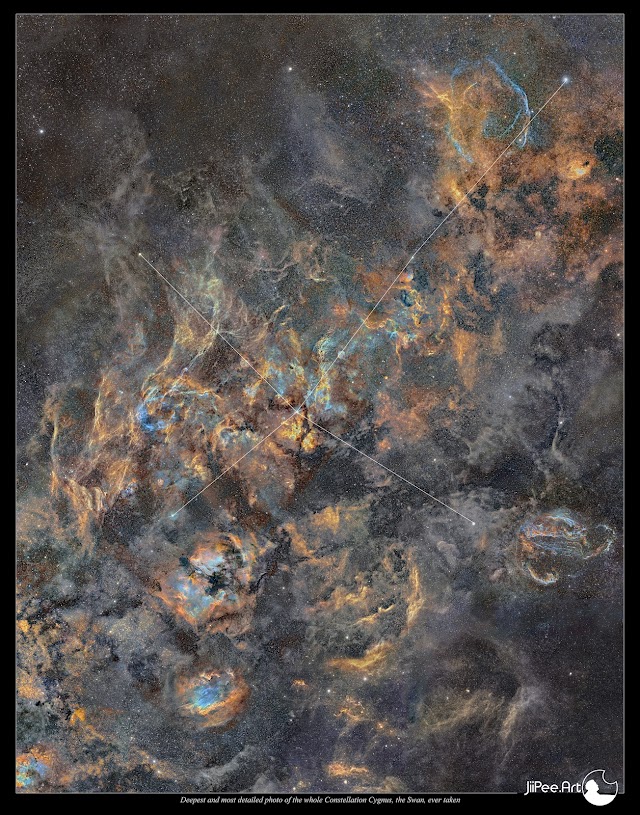
 This massive mosaic, composed of over 300 panels and around 700 hours of exposure time, showcases the entire constellation of Cygnus, the Swan. The Veil Nebula supernova remnant, including Pickering's Triangle, is visible in the lower right area, slightly off-center. Additionally, two more supernova remnants appear in the image: G65.2+5.7 SNR in the upper right corner and W63, located slightly left of center, seen as a bluish ring formation.
Link to the my blog post about this massive photo:
https://astroanarchy.blogspot.com/2021/12/cygnus-mosaic-gets-large.html
This new revision of Pickering's Triangle has a cumulative exposure time of approximately 70 hours. I have compiled all the long focal length data I captured over the years into this single deep image. Various optical configurations and focal lengths were used during this time.
Some of the data was captured using my old MEADE LX200 GPS with a 0.63 focal reducer, a QHY9 camera, and a Baader narrowband filter set. Data from 2015 to 2023 was acquired with a Celestron EDGE HD 11" telescope, an Apogee Alta U16 camera, and an Astrodon narrowband filter set. The most recent data, captured in 2024, was taken with a Celestron EDGE HD 14" telescope, an Apogee Alta U9000M camera, and an Astrodon narrowband filter set. There is also some dimm background data shot with Tokina AT-x 300mm f2.8 camera optics.
Thursday, December 19, 2024
Pansy of the Swan, Sharpless 112
My previous image was showing the Sharpless 115 an emission nebula area in Cygnus, just next to it lays another Sharpless catalog target, Sh2-112.
My new photo about Sh2-112 has O-III and S-II data from my older image of Sharpless 112 from the October 2015. The new H-alpha data is much deeper and has a higher resolution. For some reason, this target has always been very difficult to process. Details in a background are very diffused and the actual emission nebula has a vast dynamic range, from a very bright to a very dim features.
I renamed this target to a "Pansy of the Swan" since the bright nebula looks like a blooming yellow pansy.
sulfur=red, hydrogen=green and oxygen=blue
sulfur=red, hydrogen=red and oxygen=blue, this combination is very close to a natural color palette.

This is my very large mosaic photo of the whole Cygnus, more info about this massive photo
Sunday, December 15, 2024
New Photo, Sharpless 115 in Cygnus
This Portion of sky covers less than a square degrees of sky in Constellation Cygnus, the Swan.
This star nursery has always looked to me like like it was cut out of the Baroque painting.
I was able to shoot a high resolution data for it with my new imaging setup. The Celestron Edge 14". This telescope has a beautiful optics and with a secondary mirror focuser, it'll hold the collimation perfectly all the time. Normally the heavy main mirror is used for focusing and it can be source of optical problems when it moves due to gravity when the scope is moving and pointing to a different portions of sky.
BAROQUE SKY OF SHARPLESS 115
Click for a full size photo, 2000x2000 pixels
sulfur=red, hydrogen=green and oxygen=blue
Shining with the light of ionized atoms of hydrogen, sulfur, and oxygen in this Hubble palette color composite image, the nebular glow is powered by hot stars in star cluster Berkeley 90. The cluster stars are likely only 100 million years old or so and are still embedded in Sharpless 115. But the stars' strong winds and radiation have cleared away much of their dusty, natal cloud. At the emission nebula's estimated distance, this cosmic close-up spans just under 100 light-years.
Source: NASA APOD
sulfur=red, hydrogen=red and oxygen=blue, this combination is very close to a natural color palette.
This is my very large mosaic photo of the whole Cygnus, more info about this massive photo
Thursday, November 28, 2024
Beauty and the Beast, Tulip Nebula and a Black Hole
I started to collect exposures for this photo back in 2014, now I have shot new high resolution material for this amazing target with my new imaging platform.
I see several layers in my photos and that makes them to tell a story beyond any imagination.
First
A visual layer, that's naturally very important to me as a visual artist, revealing the hidden cosmic beauty and poetry is my passion.
Second
The physical layer, how emission of the nebulae works, radiation pressure, nuclear fusion of the star, gravitational phenomes, etc... all that is extremely beautiful in its own class.
Third
An existential layer, where we are coming and where we are going in a cosmic scale.
Practically all of the heavier elements in our bodies are coming from supernova explosion's, iron in our blood, oxygen, carbon, etc... We are children of the stars
When our Sun will die after few billion years and turn to a planetary nebula, it'll vaporize the Earth and our remains on it and blows them to the outer space. After aeons our remains are going to end up to a building blocks for a new generation of stars.
We all have been stars and one day we going to be stars again.
BEAUTY AND THE BEAST
Tulip Nebula and a Black Hole
Click the photo to see a high resolution photo, it's worth it
sulfur=red, hydrogen=green and oxygen=blue
Black Hole, Cygnus X-1, in a Close Up of the Full Resolution Photo
Click the photo to see a high resolution photo, it's worth it
The complex and beautiful Tulip Nebula, Sharpless 101, blossoms about 8,000 light-years away toward the constellation of Cygnus the Swan. Ultraviolet radiation from young energetic stars ionizes the atoms and powers the emission from the Tulip Nebula.
Also in the featured field of view is the black hole Cygnus X-1, which is also a microquasar because it is one of strongest X-ray sources in planet Earth's sky. The powerful jets from the black hole can't be seen in this photo since they glow light in X-ray wave length. Faint bluish curved shock front, visible at up center, is coursed by the X-ray jet when it hits to a interstellar gas and dust.
Why we can see the black hole in this image as a star like object?
We can't see the actual black hole but we can see how the material is twirling in the black hole. The speed become so high that the matter starts to turn to an energy emitting light trough the whole spectrum up to X-ray and gamma radiation.
Photo in Visual Colors
Click the photo to see a high resolution photo, it's worth it
sulfur=red, hydrogen=red and oxygen=blue
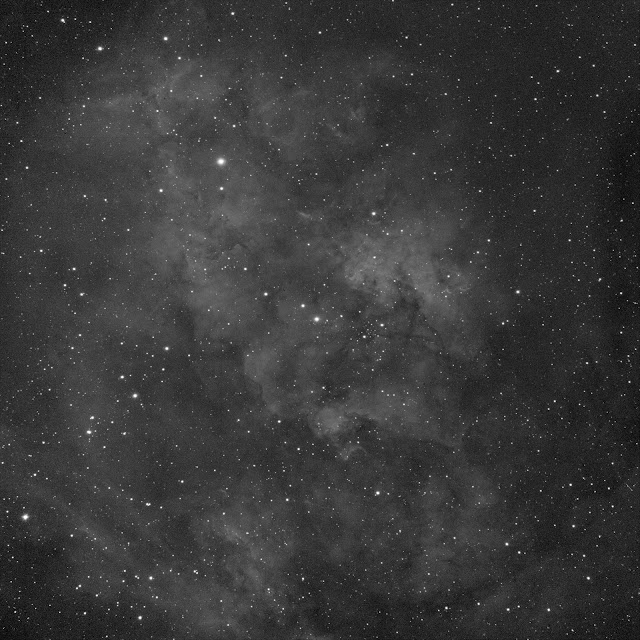
A single, full scale, 20 min H-alpha exposure, Bin 1x1
Click for a full scale image.
Click for a full scale image.
Tuesday, October 15, 2024
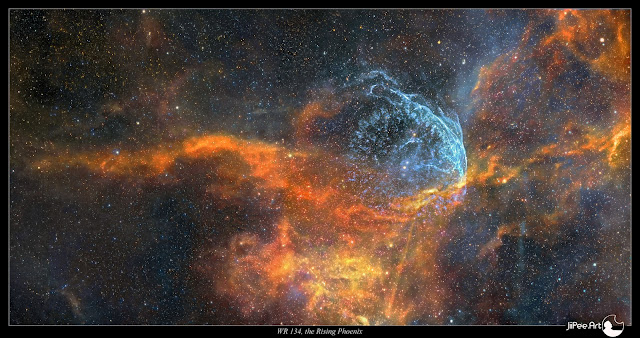
WR 134, The Rising Phoenix
BUY A POSTER
https://astroanarchy.zenfolio.com/
This is the second light for my new imaging setup, the first light image can be seen HERE
For years I have wanted to shoot a long focal length photo of this amazing mass ejecting star in constellation Cygnus, the Swan. Past five years I have done short focal length imaging with camera optics, now it's time to get closer.
I spent several clear nights to capture light emitted by an ionized elements in this gas formation. (H-alpha, S-II and O-III) For compositional reasons I ended up to a two panel mosaic image. Total exposure time is 23h.
When processing the final image I couldn't be noticing how much this formation looked like a mystical creature, the Phoenix Bird. I rarely use any other than official catalog numbers as a name of my photos but this time I simply had to name this composition to "Rising Phoenix".
When art meets science, the results can be beautiful. It can become something more than either of them on their own can ever be.
WR 134 as a Rising Phoenix
Click for a large image, 2500x1300 pixels photo shows the WR 134 like never seen before.
 The photo is in mapped colors from an ionized elements, H-alpha=green, S-II=red and O-III=blue, Original resolution is 12.000 x 7000 pixels
Info about the WR 134
WR 134 is a variable Wolf-Rayet star located around 6,000 light years away from us in the constellation of Cygnus. It's surrounded by a faint bubble of glowing ionized oxygen, blown out by the intense radiation and fast solar wind from the star. The star has five times the radius of the sun and it's 400,000 times more luminous.
My Wide Field Photo of the Area
Click for a large image, ~2500x2000 pixels
WR 134, the Rising Phoenix in visual spectrum
Click for a large image, ~2500x1300 pixels
Click for a large image
A single, full scale, 20 min O-III exposure
Click for a full scale image.
This is a dim target, 1200s O-III exposure doesn't show much about the O-III formation around the star WR 134.
 This is one of the test shots after the collimation procedure. Exposure time is 1200s with 3nm O-III filter. Image is calibrated with Dark Frame and Bias corrected Flat Frame. Target is WR 134 in Cygnus. Stars are pinpoint from corner to corner. Optical analysis of this frame can be found at end of THIS blogpost
BUY A POSTER
https://astroanarchy.zenfolio.com/
Tuesday, August 8, 2023
Grand Mosaic of the Milky Way is now large than ever
You can read a blog post about it here: Gigapixel Mosaic of the Milky Way.
This new panorama was published today for the first time in the world by the Finnish Tähdet ja Avaruus magazine.
This is the only photograph in the world that captures the Northern Milky Way with such incredible depth and detail—and now, it’s larger than ever!
Click for a large image, 7000 x 1150 pixels
Over a decade of work, 1500 hours of exposure, and 301 individual frames—all captured in a single image. Note: An image of the Full Moon is included in the lower left corner for scale.
You can now pan and zoom around the large image!
For better accessibility and to save bandwidth, the photo size has been reduced to 40,000 × 6,000 pixels from the original 120,000 × 18,000 pixels.
Note: All material on this blog is copyrighted. Any use without the author's permission is strictly prohibited.
- Panorama spans 145 x 22 degrees of sky (Full Moon covers 0,5 degrees of sky)
- Resolution 120.000 x 18.000 pixels
- Photos has 2.2 gigapixels in it, the spatial resolution is equal to 8.8 gigapixel image from color camera since all the channels are in native resolution.
- There are least nine confirmed supernova remnants in this panorama
- About 25 million stars are visible in the photo
- Distance to the nebulae in the image between 350 to 20.000 light years
- Exposure time over 1500 hours between 2009 - 2021
- 301 individual images are stitched together seamlessly
- It took about 12 years to finalize this photo
- Narrowband image from light of ionized elements, hydrogen = green, sulfur = red and oxygen = blue
- Processing time for the whole panorama, way too large part of my life
Click for a large image
I had to develop many new working methods to successfully manage this massive project. These methods had to be perfected before starting, because once the project was underway, any major changes would have required canceling it entirely.
Every detail had to be precisely planned—from the composition and its alignment with Milky Way structures to numerous technical aspects, such as handling data from different optical systems with varying spatial resolutions.
I won’t go too deep into the technical details, as the complex techniques involved are simply tools—a means to create my art.
I like to compare my long imaging projects to a relationship. But in this case, it wasn’t just between two entities—it was like being in a relationship with an entire family, a large and complex clan. Just like in a family, there might be a difficult uncle or some other challenging personalities, but you have to learn to work with them. I felt the same way while stitching together the pieces of this mosaic. Some frames simply didn’t fit the way I wanted, forcing me to reshoot them, which often took months or even years. But in the end, everything came together seamlessly, without any visible gaps.
I am a perfectionist when it comes to my photography. While this trait is essential for achieving great results, it can also be a challenge. This photo could have been finished five years earlier if I had been willing to leave out some of the extremely faint targets or settle for less detail—but I simply couldn’t.
Yet, when the image was finally complete, I didn’t think about all those sleepless, freezing nights. Instead, I remembered the pure joy I felt when the most challenging parts finally came together.
NOTE, all material in this blog is under copyright, any kind of usage without authors permission is forbidden.
Step 3,
2019 -2021, SOLVING THE BIG PUZZLE
Finally, in 2019, after so many years of work, I had gathered enough material to begin assembling the final mosaic image. The process took nearly two years due to the complex structure of the mosaic and the sheer volume of image data.
At the same time, I also had to capture additional missing material to complete the mosaic, making the process even more time-consuming. But every piece was essential to ensure the final image was as detailed and seamless as possible
I used the Cartes du Ciel, a star map software, for planning and a
preliminary fit the individual frames.
Click for a large image
AND FINALLY
At October 2021, after 12 years, 1500 hours of exposures and countless hours of work
The Grand Mosaic of the Milky Way Galaxy II
NOTE, all material in this blog is under copyright, any kind of usage without authors permission is forbidden.
I was certain I had captured that particular section three years ago, yet no matter how hard I searched, I couldn’t find it on any of my hard drives. As a result, I had to endure several painfully long weeks waiting for the right conditions to reshoot the missing piece. Only then could I finally complete this massive cosmic puzzle.
Optical Configurations
Over the years, I have used several optical setups to capture this mosaic.
- Up until 2014, I worked with a Meade LX200 GPS 12" telescope, a QHY9 astro camera, Canon EF 200mm f/1.8 optics, and a Baader narrowband filter set.
- Since 2014, I have used a 10Micron 1000 equatorial mount, an Apogee Alta U16 astro camera, a Tokina AT-X 200mm f/2.8 lens, and an Astrodon 50mm square narrowband filter set.
I have also captured many high-resolution details using longer focal lengths:
- Before 2014: Meade 12" telescope with a reducer
- After 2014: Celestron EDGE 11" with a reducer
- Guide cameras: Lodestar and later Lodestar II
I chose my current setup as the base tool for this project because it offers a high resolution combined with an exceptionally large field of view. Additionally, it collects photons very efficiently due to being undersampled, allowing extremely faint background nebulosity to become visible in a relatively short exposure time—often, a 30-minute frame is sufficient.
Mosaic Processing
I assemble all my mosaic images in Photoshop. Aligning the individual panels using stars as reference points is fairly straightforward. Over the years, my processing workflow has become so consistent that only minor adjustments—such as small tweaks to levels, curves, and color balance—are needed between frames.
To enhance details, I have incorporated many high-resolution subframes into the mosaic (see the mosaic map at the top of the page). To seamlessly integrate longer focal length images with shorter focal length data, I developed a custom method:
- Upscale the short focal length frames by ~25% to provide more room for high-resolution data.
- Match the high-resolution image to the mosaic, using stars as reference points.
- Remove all tiny stars from the high-resolution image to prevent optical distortions.
- Separate the stars from the low-resolution image and blend the starless high-resolution data with the starless low-resolution frame.
- Reintroduce the removed low-resolution stars on top of everything—ensuring zero data loss and maintaining a uniform star field across the entire mosaic.
This method eliminates optical distortions, which are especially noticeable in dense star fields. Since all stars in the final image originate from the same optical setup, I avoid inconsistencies. I use the same star removal technique as in my Tone Mapping Workflow to achieve this seamless integration.


