COPYRIGHT, PLEASE NOTE

All the material on this website is copyrighted to J-P Metsavainio, if not otherwise stated. Any content on this website may not be reproduced without the author’s permission.

Have a visit in my portfolio

Saturday, January 31, 2009

APOD

[nasa-large.jpg]

Astronomy Picture of the Day

-

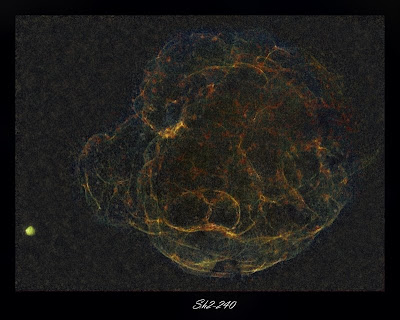
My "Sh2-240" Supernova Remnant image was selected as an "Astronomy Picture of the Day" by the NASA. You can see the NASA page here: http://apod.nasa.gov/apod/ap090131.html

-

This was my second APOD, previous one can be seen here:

http://apod.nasa.gov/apod/ap081107.html

Friday, January 30, 2009

1. Universe Today, article

Yesterday the Universe Today publification
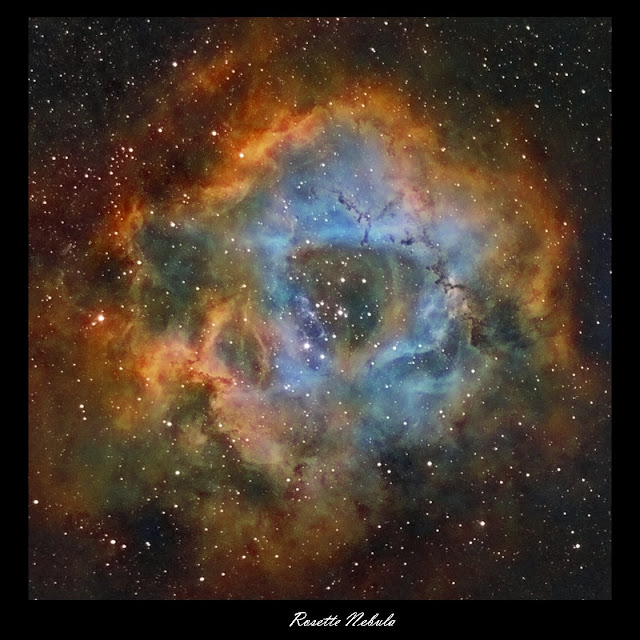
use one of my stereo image, "Rosette Nebula", in they article.
-
The name of the article is "a rose by any other name... would look twice as sweet!"
-

The image they used in the article
-
The story is written by the Tammy Plotner, an impressive Lady, http://www.universetoday.com/author/tammy/

Wednesday, January 28, 2009

Sh2-240, Supernova remnant as a Stereo Pair


Two versions, first for the Parallel Vision method and the second
for the Cross Vision method.
Viewing istructions, please, look for thr Right hand side menu.
-
Original image and imaging data cna be found here:

Sunday, January 25, 2009

IC443, a start of the new project

False color Hydrogen alpha H-a
H-a, stars are supressed to show the nebulosity.
-
-
IC443 is a supernova remnant in Gemini.
Last night I installed a Tokina 300mm AT f2.8 lens front of the QHY9 astro camera.
This combination gives me resolution of 3,5 "/pixel, witch mean practically seeing limited
details. The fiels of view is about 207' x 157'.
-
At the time I was able to shot this target it was low in the sky, about
30 degrees, that and very bad transparency and seeing cut down the sharpness a lot.
-
I will shot more Ha-light when weather allows and I'm going to
add O-III and S-II data as well to create a narrowband composition.
-
Imaging details:
Optics, Tokina 300mm AT f2.8 @ 2.8
Camera, QHY9 astro camera Guiding, QHY5 and PHD-Guiding on LX200 GPS 12" Exposures, 8x600s +darks, bias and flats Filter, Baader 7nm H-alpha

Thursday, January 22, 2009

Rosette Nebula as a Stereo pair.


I turned this image of Rosette Nebula to a Stereo pair format by
adding some volume.
The result is more or less an educational guess about real 3D appearance of this formation.
-
Two versions, first for Parallel Vision , and the second for Cross Vision method.
-
The original image and the image information can be found here:
-
Viewing instructions, please, look for the Right hand side menu.

Saturday, January 17, 2009

Sh2-240, more lights


This is a second version of Sh-240 this year.
I added more H-a light. Now image is smooth and signal / noise is
improved. I might shoot more lights for this later in this spring.
-
Two versions, first in Hubble palette and secon in "natural" color narrowband composoite.
-
Exposures so far are:
H-alpha, 12x600s + 24x300s(binned 2x2) + 12x600s = 6h
S-II, 5x600s (binned 2x2)
O-III, 14x300s (binned 3x3)
-
Optics: Canon 200mm EF f1.8 @ f1.8 Camera: QHY9 @ -50 C Guiding: Lx200 GPS 12" + LQHY5 and PHD-Guiding - The information in O-III channel is extremely weak. I used a special technique of mine to dig it out for color information. This image serie shows how weak the O-III realy is.

Thursday, January 15, 2009

Sh2-240, a Supernova remnant. (Simeis 147)
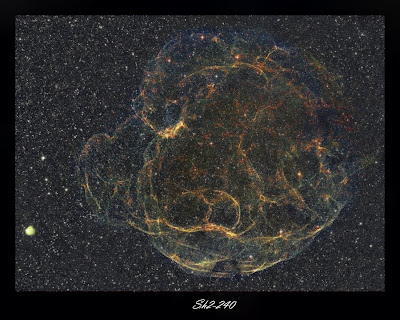
I have never seen this object in HST narrowband colors.
After strucling with this last night, I don't wonder why.
This is a extremely difficult objekt it has a super low surface brightness and
it's huge!
This is a supernova remant in Taurus & Auriga it has the angular diameter of 200'x180'. Thats about 8 full Moon!
-
There was very litle data on O-III channel.
With extreme stretching and by using the method I have developed for narrowband work, some O-III glow can be clearly be seen deep down in data.
-
Total exposure time was relatively short doe the very fasr f1.8 optics.
-
Exposures:
-H-alpha 12x600s binned 1x1+ 24x300s binned 2x2, total 4h
-S-II 5x600s binned 2x2
-O-III 14x300s binned 3x3
Optics:
Canon 200mm EF f1.8 @ f1.8
Camera:
QHY9 @ -50 C
Guiding:
Lx200 GPS 12" + LQHY5 and PHD-Guiding
-
The information in O-III channel is extremely weak.
I used a special technique of mine to dig it out for color information.
This image serie shows how weak the O-III realy is.
Here is a Starless version to better show the nebulosity.
-
I keep coming back to this fascinating object, there is something mysterious
about its appearance and the fact, that it's difficult to shoot makes it even more interesting.
-
Here is some elaier tryouts with Sh2-240:

Thursday, January 8, 2009

QHY9 & Canon EF 200mm f1.8 "Startest"
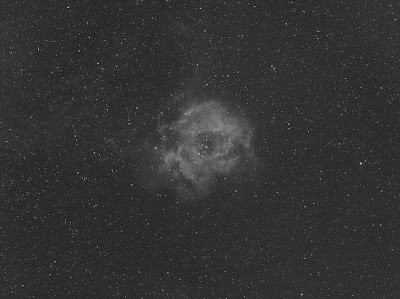
NOTE,
The JPG image is large, 2,7mb.
(You have to load the image from Picassa to see it in Full Resolution.)
-
NOTE2,
The image looks litle soft. It's not doe the optics or focus but
very low altitude of the object up here North.
The maximum elevation was 29 degrees when Rosette was imaged.
-
-
Here is a single five minute exposure about Rosette Nebula.
Stars are pinpoint from edge to edge. I haven't test the Chromatic aberration
yet, since I'm shooting narrowband at the moment.
There should be very litle of it doe the exotic class in the lens system.
You can read more about it from here:
-
On the lower left corner stars are somehow stretched, thats not an optical flaw.
That happends when the camera is no absolute perpendicular to the lens.
The critical focus zone is only 7/1000mm and even slightest tilt can be seen in the image.
I'll correct thet later by rotating the camera in M42 0.75mm thread to an
other position.
-
This is a single calibrated 5min. image.
Flat, Bias and One Dark frame for bad pixels is used.
Image is then stretched and converted to 8bit doe the JPG algorithm.
No other image processing is done.
-
DETAILS:
Optics, Canon EF 200mm f1.8L @ f1.8
Camera, QHY9 astro camera
Guiding, QHY5 and PHD-Guiding on LX200 GPS 12"
Exposure, 1x300s
Filter, Baader 7nm H-alpha

Firs light for QHY9 and 200mm f1.8 lens
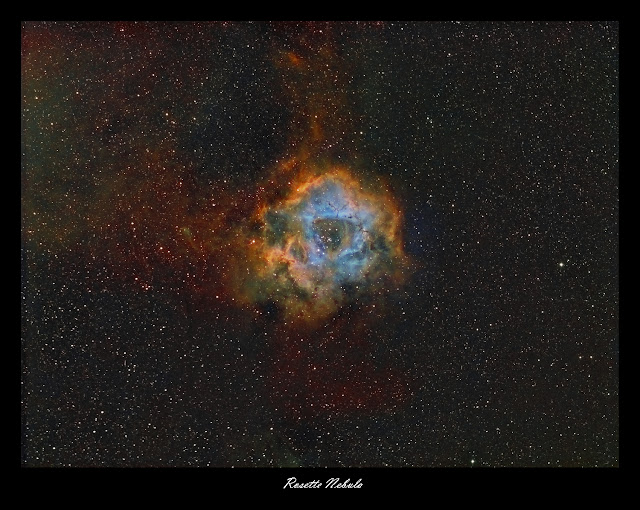

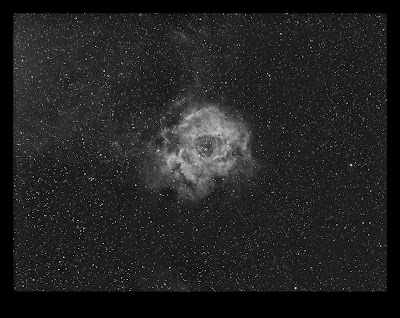
ROSETTE NEBULA (target was only between 20-30 degrees above horizont)
Ha 12 x 5min = 1h, O-III 3x5min and S-II 3x5min


-
100% grob from Rosette nebula image
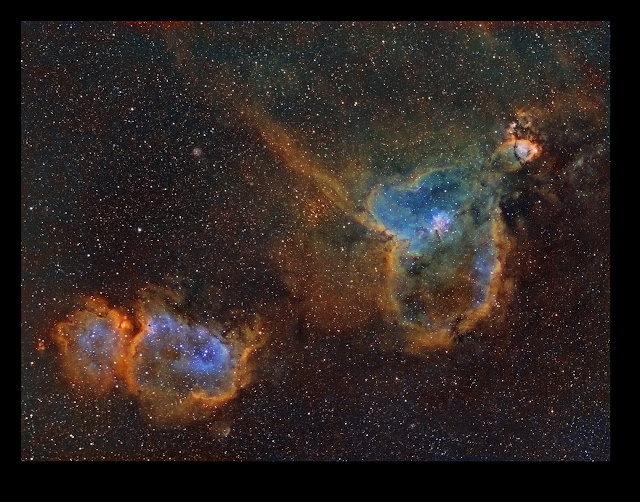
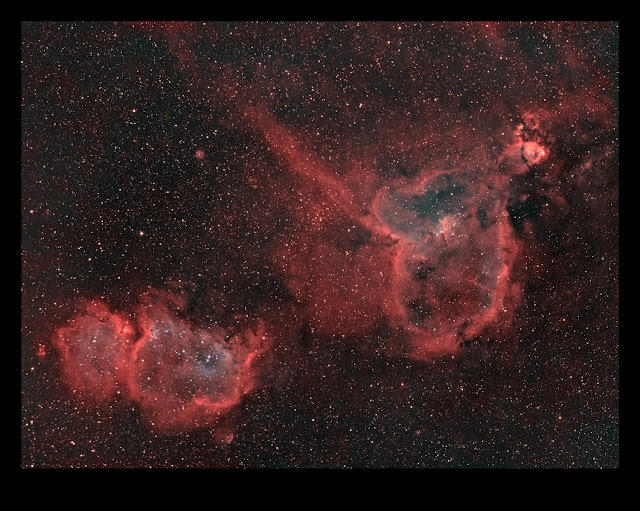
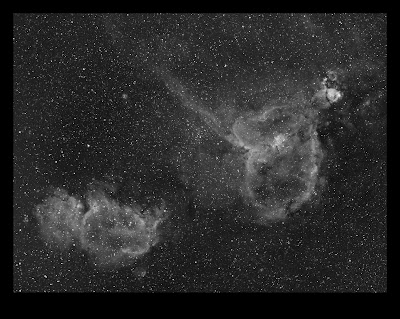
- HEART & SOUL H-alpha 12 x 5min. = 1h, O-III 3 x 5min and S-II 3x5min. Rosette in "natural color"
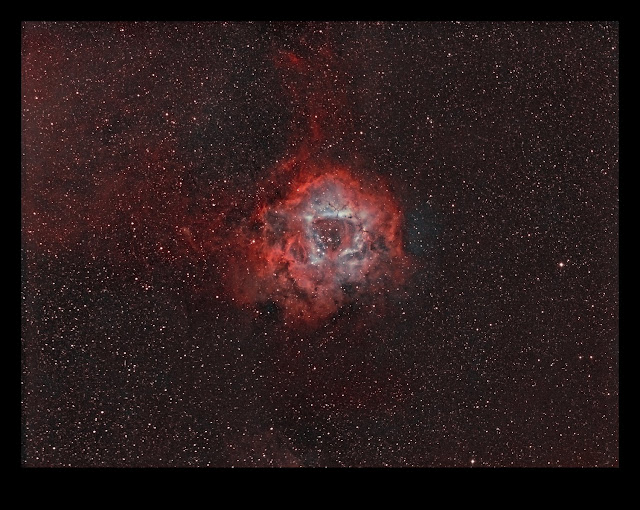
H & S in natural color
1h. 7nm H-alpha channel
1h 7nm H-alpha channe
After so many technical difficulties I managed to shot
first lights for QHY9 astro camera.
Everything worked smoothly with new ASCOM driver, MaximDL
and FocusMax.
This is real firs light for my new lens, Canon EF 200mm f1.8´, as well.
-
It was really an experience to shot with f1.8 optics.
Extreme fast optical conficuration and difraction limited lenses makes this lens
to a dream machine for astro imaging.
Pay attention to exposuretimes of the first light images.
-
Focusing at f1.8 is least difficult. The critical focus zone is only 7 microns =
7/1000mm!
I am using the TCF-s focuser and there is a temperature compensation build in.
I noticed, that about a half degree temperature drop is enough
to make focus soft. Without temp. compensation this lens must be focused
after every image.
Actual focusin is done by rotating the focusing ring of the lens by TCF-s focuser.
There is images about this system in R&D part of the pages.
-
With this lens and camera combo I can have both, wide field and high resolution.

Wednesday, January 7, 2009

A New Observatory!

After shooting from very bad location many years I finally have had
a new location for my observatory.
It stil located in very center of the Town and light pollution is a huge problem.
the good thing is, that new place has a good warm room next to the roof dec.
The dec is very well protected from the wind and I have 360 degree free view above 25 degree. There will be a protective building around the telescope in near future.
-
I build a permanent pear for the telescope. It makes a huge difference to my polar alignment
and vibrations. Since I'm using my telescope for photographing only, I made the pier
only 60 cm high. It's very heavy doe the 20mm steal and the actual pier diameter is 200mm.
Here is some images from the new location.

Telescope on the new pier

Canon 200mm f1.8 monster lens on the telescope. The pier before painting and bolting down. Leveling is done by the four bolt in the concrete.

Modification to QHY9 camera

I made a small mod to the QHY9.
There is now angular scale added to the camera.
to be able to read the scale in any position I made it
to move by the gravity. Now I can easily rotate the camera
to specified angle for guide stars when OAG is used or moaic images are made.

QHY9 8,6mb cooled astro camera

My new B&W astro camera is now under testing.
So far it looks like a winner!
Information about the camera: http://www.qhyccd.com/QHY9.html
The KAF8300 sensor is not known for low noise,
I was litle worried about it.
After first tests I can say, the noise is not a problem.
Cooling in this camera is very good.
-
I tested the cooling with ambient temperature of -10C.
It took about 60s. to reach maximum cooling, -60C,
and I was uning about 95% of the maximum cooling power.
-
Here is the QE of the camera (The Green line):

Main Features Total pixel : 3448*2574 (8.9mega pixel) Active pixels: 3358*2536 (8.6mega pixel) Pixel Size: 5.4um*5.4um FullWell: 25.5Ke- Imager Size : 19.7*15.04mm 4/3inch Readout noise: TBD(Appox 10e maybe) Preview Speed: 3Mpixel/s (3sec download time) Download Speed: 1Mpixel/s (9sec download time) Peak QE: 56% @540nm 48%@Ha Microlensing on chip ABG: 1000X 16bit ADC with CDS and Preamp USB2.0 High Speed interface Build in 32MBytes SDRAM buffer Support Binning: No Bin, 2*2,3*3,4*4 Communication port to QHY color wheel Improved 2-Stage TEC cooling -50 from ambinet Improved Heat Sink For KODAK CCD Build in Temp sensor and 16bit high presion ADC DC103 DC adapter & TEC Controller, Regulated Build in Mechanical shutter for Full Frame CCD Fully Airproof with Two 4.0mm Air Socket Weight: 510g Deep Cooling DC103 DC adapter & TEC controller Single voltage Input: +12V Output +-15V +5V to CCD PWM TEC controller: 0V-12V to TEC Single Cable connection with QHY2PRO Accquire Temp sensor information For more informations please visit discuss forum http://qhyccd.com/ccdbbs/index.php?topic=989.0

-

Some quick and dirty first test images.

Note! NO DARKS are used, only flats and BIAS, 7nm Baader H-alpha filter.

Images are scaled down 50%.

Rosette Nebula. 2 x 10 min with Canon 200mm EF f1.8L lens and QHY9. NO Darks

Extremely dim supernova remnant in Taurus. Only 5 x 10min Canon 200mm EF f1.8L lens and QHY9, NO Darks
California Nebula, 2 x 10min Canon 200mm EF f1.8L lens and QHY9. No Darks
-
Please Note!
Images here are just a very quick test.
The lens was manually focused, and at f1.8 it's not possible to do accuratetly,
all the images are somehow soft for that reason.
No sharpening or noise reduction was used, just stretching.
-
The camera has a small pixel size, 5,4 microns.
That gives me resolution of 5"/pixel with 200mm Canon lens.
With 300mm Tokina it will give about 3"/pixel.
Under sampled? yes a litle, but with my seeing conditions not actually at all.
With those lenses I can have both, high resolution and wide field!
-
With longer focal lenght, like my LX200 GPS 12", the camera can be binned down 2x2.
It will give resolution of about 1"/pixel. Doe the fact, that the camera has 8,6mb,
image has enough resolution after binning.

Canon 200mm f1.8 lens


My new camera lens is a World fastest telelens, Canon EF 200mm f1.8L.
Here is some information:
-
This lens has best difraction limited optical quality I have seen.
Lens is used in SuperWASP project, actually eight of them:
-
The model I bought is electronically focused, so there is no mechanical link between lenses and
focusin ring. After lots of thinking I ended up to modify the lens for the astro work.
Opening up and messing with electronic and mechanic of the expencive lens was not a
easy decision, but it was the only way to use it with my new astrocamera, QHY9.
-
Modification:
  • removing the original Canon bajonet
  • cutting off all the wires between the lens and the bajonet
  • soldering an extencion cord between the lens and the bajonet
  • attachment of the M42 ,75mm thread to the lens end
-
Aftger the modification I can use any EOS Canon body to powering up and adjust the lens
-
Images of the modification:

Original wires are cutted and extencions soldered in.
Canon bajonet with cutted wires. Extencion cords are soldered to the bajonet. M42 ,75mm thread is attached to lens end.
Allmost ready assembly.
-
As you can see from the images I used the lenses filter holder as a route for the cords.
(The canon holder is too small for 2" astronomical filters.)
After final image I wrap some aluminium foil around the lens end to
prevent any light leaks. The foil was then attached with
Black tape around it.
After the modification the lens can be controlled with any unexpencive EOS body.
I build a power source for the EOS body, so there is
no need for the batterys.