COPYRIGHT, PLEASE NOTE

All the material on this website is copyrighted to J-P Metsavainio, if not otherwise stated. Any content on this website may not be reproduced without the author’s permission.

Have a visit in my portfolio

Monday, September 13, 2021

Beyond the astronomical photography

NOTE. Vision series artworks are soon to be sold as NFT  @SuperRare

 I’m an astrophotographer but first of all I’m a visual artist, as an artist, I’m dazzled by all the forms I’m able to capture in my photos of cosmic objects, nebulae, supernova remnants, galaxies, etc. Colors from ionized elements are connected to the shapes and textures, they form a physical reality around us.

I’m telling a story with my photos, and many times my artworks are also personal notes. The Vision series of photos are forming visual notes about shapes, structures, textures, and colors I have seen and captured during my couple of decades-long journey as an astronomical nature photographer.

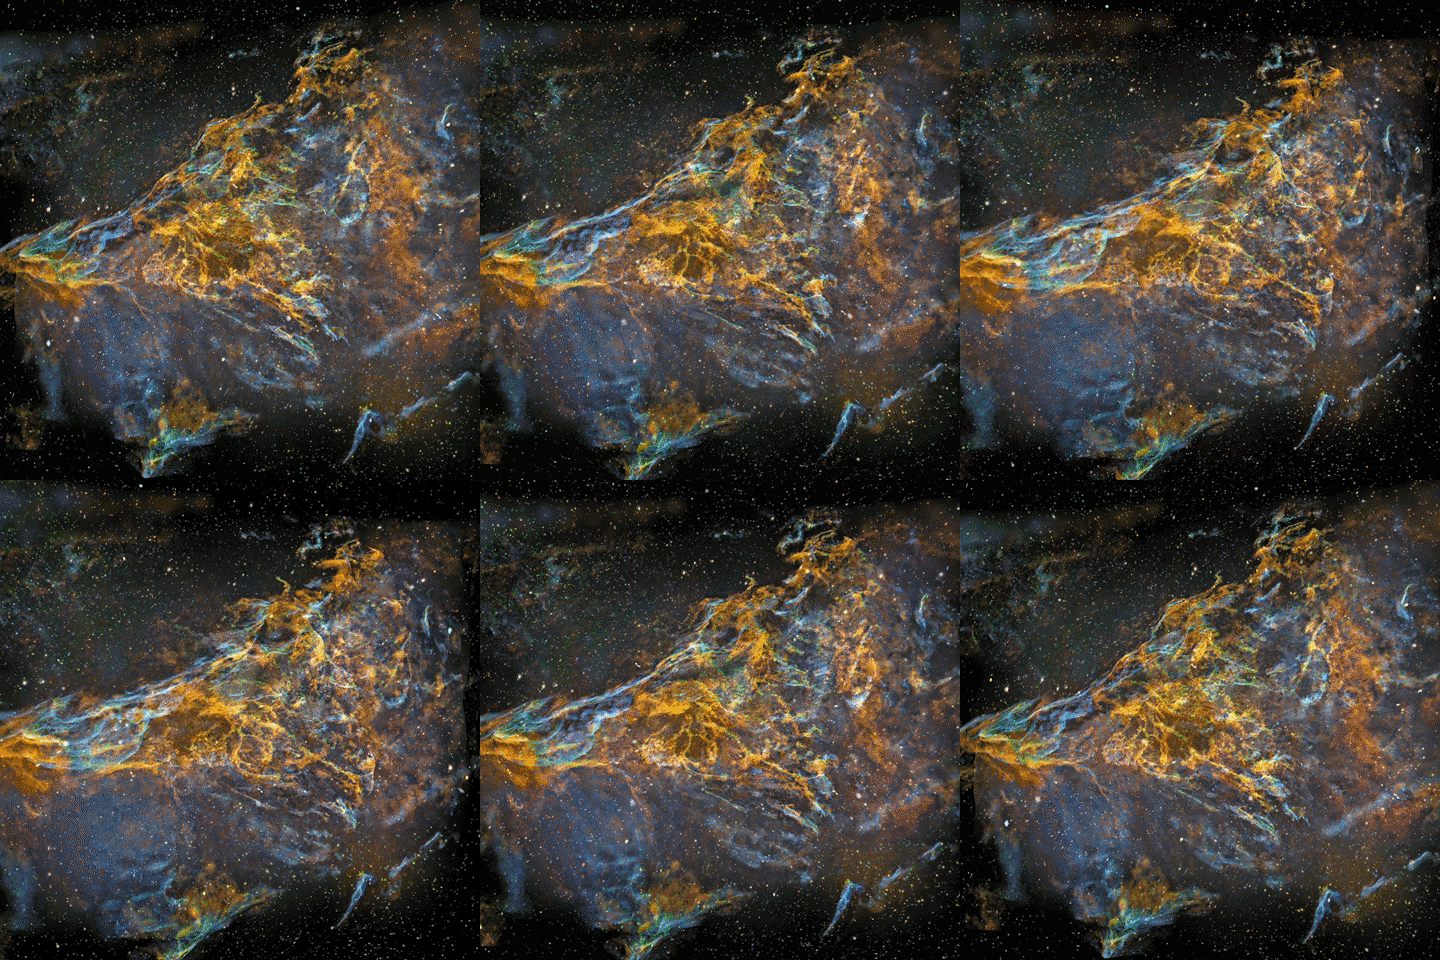
Every single element in Vision series photos are from my original astronomical photos. I have been using the Overlapping Lightning Method (Multi Exposure Method) to create my Vision series photographs. By this method the forms and structures in astronomical object get multiplied, they are now forming a new visual dimension beyond our physical universe.

The photographic method I'm using was fashionable back in the 1920s among avant-gardists and surrealistic photographers.  At the time the work was done in a darkroom, I’m using about the same technique but instead of a darkroom, I’m using digital image processing.

The original photo is rotated, moved, and/or mirrored as I like, and then multiple layers stacked back together so that the original brightness is maintained. For this task, I use Photoshop and various astronomical stacking methods and applications.

Few samples of my Vision Series, the original astronomical photo I used to create them at end of the page.

Visions of Veil
Please, click for a large image 


Visions  of Veil series is based on my original photo


Friday, August 27, 2021

Visions of Veil

 This is an experimental test with a 3D-conversion of my astronomical image. Only real elements from the original image are used, there is nothing added but the estimated volumetric information!

NOTE. This is a personal vision about shapes and volumes, based on some scientific data, deduction and an artistic impression.


NFT of this video is for sale @SuperRare


Visions of Veil


 Original 2D Image, NASA APOD 2015
Click for a large image


How is the volume added to my photos?

Importantly, for as long as I have captured images of celestial objects, I have always seen them in three dimensions in the theatre of my mind. I did develop a unique process to create scientifically accurate 3D volumetric images of 'my' nebulas. The final 3D volumetric image is always an appraised simulation of reality based on known scientific data, deduction, and some artistic creativity.

After I have collected all the necessary scientific information about my target, I start my 3-D conversion using the stars in the image. Usually there is a recognizable star cluster which is responsible for ionizing the nebula. We don’t need to know its absolute location since we know its relative location. Stars ionizing the nebula have to be very close to the nebula structure itself. I usually divide up the rest of the stars by their apparent brightness, which can then be used as an indicator of their distances, brighter being closer. If true star distances are available, I use them, but most of the time my rule of thumb is sufficient. By using a scientific estimate of the distance of the Milky Way object, I can then locate the correct number of stars in front of it and behind it.

Emission nebulae are not lit up directly by starlight; they are usually way too large for that. Rather, stellar radiation ionizes elements within the gas cloud. So, it’s the nebula itself that is glowing. (The principle is very much the same as in fluorescent tubes.) The thickness of the nebula can be estimated from its brightness, since the whole volume of gas is glowing, brighter means thicker. Nebulae are also more or less transparent, so we can see both sides of it at the same time, and this makes model-making a little easier since not much is hidden.

The local stellar wind, from the star cluster inside the nebula, shapes the nebula by blowing away the gas around the star cluster. The stellar wind usually forms a kind of cavity in the nebulosity. The collapsing gas can resist the stellar wind and produces pillar like formations which must point to a cluster.

Oxygen needs a lot energy to ionize it, this can only be achieved relatively close to the star cluster in the nebula. I use this information to position the O-III area (the bluish glow) at the correct distance relative to the heart of the nebula.

Many other small indicators can be found by carefully studying the image itself. For example, if there is a dark nebula in the image, it must be located in front of the emission nebula, otherwise we can’t see it.

Explosions in space are more or less symmetrical, due to that, most of the supernova remnants and planetary nebulae mainly has a ball like appearance.

Using the known data in this way I build a kind of skeleton model of the nebula. Then the artistic part is mixed with the scientific and logical elements, and after that the rest is very much like creating a sculpture on a cosmic scale.


Tuesday, August 17, 2021

A starless Pickering's Triange

 As far as I know, I was the first who published starless nebula images back in 2007. At the time  the feedback was less than positive.

The reason to publish such a unorthodox images was that the starless version is a part of my processing workflow and it can sometimes show more than the actual image.
I have used this technique ever since and published some starless images now and then. 

Starless images are very powerful, when I want to dig out some really dim objects in a very dense starfield. It makes processing so much easier, I don't need to be careful not to blow up the stars.
Normally all the stars are placed back with a zero data lost after processing is done.

Starless images are also a great help to see the actual structure in the nebula since human brains has a tendency to form a quasi logical shapes out of the random cloud of dots, like stars are. 

A Starless Pickering's Triangle
Please, click for a large image, it's worth it!
 
Part of  Veil Nebula supernova remnant, the Pickering's Triangle.Colors are from the ionized elements, Hydrogen, Sulfur and Oxygen. S-II = Red, H-alpha = Green and O-III = Blue.  This is one of the most detailed image of the Pickering's Triangle I have ever seen.


A wide field photo of the Veil Nebula supernova remnant

The Pickering's Triangle can be see at one o'clock position.
My blog post about the wide field shot can be seen HERE.


Monday, August 9, 2021

Pickering's Triangle reprocessed with some new data

 I originally shot this image at September 2015 and it was selected as a NASA APOD (Astronomy Picture of the Day) at same month.


After the 2015 I have learned a lot and also shot lots of new data. The data I have shot is taken with much shorter focal length than original data but it was much deeper. I connected some dim background and color data from wide field image to this new version of Pickering's Triangle by using my new yet unpublished imaging method the VARES (variable Resolution imaging)
I kind of like the result, colors are more vivid and background has deeper shades.

Pickering's Triangle
Please, click for a large image, it's worth it!

Part of the two frame mosaic of the Veil Nebula supernova remnant, the Pickering's Triangle.
Colors are from the ionized elements, Hydrogen, Sulfur and Oxygen. 
S-II = Red, H-alpha = Green and O-III = Blue. 

A wide field photo of the Veil Nebula supernova remnant

The Pickering's Triangle can be see at one o'clock position.
My blog post about the wide field shot can be seen HERE.

Technical details and more images:
https://astroanarchy.blogspot.com/2015/09/pickerings-triangle-my-first-light-for.html