
Tuesday, July 28, 2015
An experimental 3D-study of an emission nebula IC 410
This is an experimental test with a 3D-conversion of my astronomical image. Only real elements from the original image are used, there is nothing added but the estimated volumetric information!
NOTE. This is a personal vision about shapes and volumes, based on some scientific data, deduction and an artistic impression.
My original photo of the IC 410
click for a large image
 A blog post about this photo, with the technical details, can be seen HERE
An animated GIF

A flythrough video
A flyby video
A study about the general structure of the IC 410
 All pillar like formations are pointing to a source of ionization, the open cluster NGC 1893 at the heart of the IC 410. There are some more dense areas in a gas, able to resist the radiation pressure from young star cluster. Those dense areas, at tip of the pillars, are also potential places for the formations of the new stars. A radiation pressure (solar wind) from the cluster NGC 1893 is forming a hollow space inside a gas cloud, it can be seen in my 3D-studies too.
Stereo images of the IC 410
Parallel and Cross vision stereo pairs. An anaglyph Red/Cyan image (Red/Cyan eyeglasses are needed)
http://astroanarchy.blogspot.fi/2015/02/a-3d-study-of-ic-410-as-free-view.html
 A Cross vision stereo pair as a sample, other formats behind the link above.
Info about the technique used
NOTE. This is a personal vision about shapes and volumes, based on some scientific data, deduction and an artistic impression.
My original photo of the IC 410
click for a large image
An animated GIF
A flythrough video
This is a looped video, click to start and stop. Original movie is in HD720p resolution.
¨A flyby video
This is a looped video, click to start and stop. Original movie is in HD720p resolution.
A study about the general structure of the IC 410

Stereo images of the IC 410
Parallel and Cross vision stereo pairs. An anaglyph Red/Cyan image (Red/Cyan eyeglasses are needed)
http://astroanarchy.blogspot.fi/2015/02/a-3d-study-of-ic-410-as-free-view.html
Info about the technique used
For as long as I have captured images of celestial objects, I have always seen
them three-dimensionally in my head. Over time I realized that we actually have
enough scientific information to build a coarse skeleton model of the nebula itself.
The scientific information makes my visions much more accurate, and the 3-D technique I have developed enables me to share those beautiful visions with others.
How accurate my 3-D-visions are depends on how much accurate information I have and how well I implement it.
Also, many different estimates are needed for the 3-D model. The final 3-D-image is always an appraised simulation of reality based on known scientific facts, deduction, and some artistic creativity
Also, many different estimates are needed for the 3-D model. The final 3-D-image is always an appraised simulation of reality based on known scientific facts, deduction, and some artistic creativity
on top of everything else.
After I have collected all the necessary scientific information about my target,
I start my 3-D conversion using the stars in the image. Usually there is a recognizable star cluster which is responsible for ionizing the nebula. We don’t need to
know its absolute location since we know its relative location. Stars ionizing the
nebula have to be very close to the nebula structure itself. I usually divide up the
rest of the stars by their apparent brightness, which can then be used as an indicator of their distances, brighter being closer. If true star distances are available
I use them, but most of the time my rule of thumb is sufficient.
By using a scientific estimate of the distance of the Milky Way object, I can
By using a scientific estimate of the distance of the Milky Way object, I can
then locate the correct number of stars in front of it and behind it.
Emission nebulae are not lit up directly by starlight; they are usually way too
large for that. Rather, stellar radiation ionizes elements within the gas cloud. So it
is the nebula itself that is glowing, at the characteristic wavelengths of each ionized element. (The principle is very much the same as in fluorescent tubes.) I use
this information for my 3-D model. The thickness of the nebula can be estimated
from its brightness, since the whole volume of gas is glowing, brighter means
thicker. By this means, forms of the nebula can be turned to a real 3-D shape.
Nebulae are also more or less transparent, so we can see both sides of it at the
same time, and this makes model-making a little easier since not much is hidden.
The local stellar wind, from the star cluster inside the nebula, shapes the
nebula by blowing away the gas around the star cluster. The stellar wind usually
forms a kind of cavity in the nebulosity. The same stellar wind also initiates the
further collapse of the gas cloud and the birth of the second generation of stars
in the nebula. The collapsing gas can resist the stellar wind and produces pillar like formations which must point to a cluster.
Ionized oxygen (O-III) glows with a bluish light, and since oxygen needs a lot
of energy to ionize it, this can only be achieved relatively close to the star cluster
in the nebula. I use this information to position the O-III area (the bluish glow) at
the correct distance relative to the heart of the nebula.
Many other small indicators can be found by carefully studying the image
itself. For example, if there is a dark nebula in the image, it must be located in
front of the emission nebula, otherwise we can’t see it.
Explosions in space are more or less symmetrical, due to that, most of the supernova remnants and planetary nebulae mainly has a ball like appearance .
Explosions in space are more or less symmetrical, due to that, most of the supernova remnants and planetary nebulae mainly has a ball like appearance .
Using the known data in this way I build a kind of skeleton model of the
nebula. Then the artistic part is mixed with the scientific and logical elements,
and after that the rest is very much like creating a sculpture on a cosmic scale

Wednesday, July 22, 2015
Pickering's Triangle in O-III light, an experimental 3D-study
This is an experimental test with a 3D-conversion of my astronomical image. Only real elements from the original image are used, there is nothing added but the estimated volumetric information!
NOTE. This is a personal vision about shapes and volumes, based on some scientific data, deduction and an artistic impression.
My original photo of the Pickering's Triangle
click for a large image

A blog post about this photo, with the technical details, can be seen HERE
The 3D-study as a video
This is a looped video, click to start and stop. Original movie is in HD720p resolution.
An older 3D-study of the Veil Nebula supernova remnant
Veil Nebula supernova remnant as a 3D-model
In constellation Cygnus, animation in natural colors
This is a looped video, click to start and stop. Original movie is in HD1080p resolution.
Info about the technique used
Due to huge distances, real parallax can't be imaged in most of the astronomical objects.
I have developed an experimental technique to convert my astropics to a artificial volumetric models.
My 3-D experiments are a mixture of science and an artistic impression. I collect distance and other information before I do my 3-D conversion. Usually there are known stars, coursing the ionization, so I can place them at right relative distance. If I know a distance to the nebula, I can fine tune distances of the stars so, that right amount of stars are front and behind of the object.
I use a “rule of thumb” method for stars: brighter is closer, but if a real distance is known, I'm using that. Many 3-D shapes can be figured out just by looking carefully the structures in nebula, such as dark nebulae must be at front of the emission nebulae in order to show up etc...
The general structure of many star forming regions is very same, there is a group of young stars, as an open cluster inside of the nebula. The stellar wind from the stars is then blowing the gas away around the cluster and forming a kind of cavitation – or a hole — around it. The pillar-like formations in the nebula must point to a source of stellar wind, for the same reason.
How accurate the final model is, depends how much I have known and guessed right. The motivation to make those 3-D-studies is just to show, that objects in the images are not like paintings on the canvas but really three dimensional objects floating in the three dimensional space. This generally adds a new dimension to my hobby as an astronomical imager.
Saturday, July 18, 2015
An experimental 3D-study of an emission nebula Cederblad 214
This is an experimental test with a 3D-conversion of my astronomical image. Only real elements from the original image are used, there is nothing added but the estimated volumetric information!
NOTE. This is a personal vision about shapes and volumes, based on some scientific data, deduction and an artistic impression.
My original photo of the Cederblad 214
click for a large image
 Pillar like formations of Cederblad 214.
A blog post about this photo, with the technical details, can be seen HERE
An animated GIF
 Please, let the animation load for a few moments to see smooth movement. ~8,5MB
A flythrough video

Info about the technique used
NOTE. This is a personal vision about shapes and volumes, based on some scientific data, deduction and an artistic impression.
My original photo of the Cederblad 214
click for a large image
A blog post about this photo, with the technical details, can be seen HERE

A flythrough video
This is a looped video, click to start and stop. Original movie is in HD720p resolution.
A study about shapes in the nebula

All pillar like formations are pointing to a source of ionization, the open cluster NGC 7822. There are some more dense areas in a gas, able to resist the radiation pressure from young star cluster. Those dense areas, at tip of the pillars, are also potential places for the formations of the new stars. A radiation pressure (solar wind) from the cluster 7822 is forming a hollow space inside a gas cloud, it can be seen in my 3D-studies too.
Info about the technique used
Due to huge distances, real parallax can't be imaged in most of the astronomical objects.
I have developed an experimental technique to convert my astropics to a artificial volumetric models.
My 3-D experiments are a mixture of science and an artistic impression. I collect distance and other information before I do my 3-D conversion. Usually there are known stars, coursing the ionization, so I can place them at right relative distance. If I know a distance to the nebula, I can fine tune distances of the stars so, that right amount of stars are front and behind of the object.
I use a “rule of thumb” method for stars: brighter is closer, but if a real distance is known, I'm using that. Many 3-D shapes can be figured out just by looking carefully the structures in nebula, such as dark nebulae must be at front of the emission nebulae in order to show up etc...
The general structure of many star forming regions is very same, there is a group of young stars, as an open cluster inside of the nebula. The stellar wind from the stars is then blowing the gas away around the cluster and forming a kind of cavitation – or a hole — around it. The pillar-like formations in the nebula must point to a source of stellar wind, for the same reason.
How accurate the final model is, depends how much I have known and guessed right. The motivation to make those 3-D-studies is just to show, that objects in the images are not like paintings on the canvas but really three dimensional objects floating in the three dimensional space. This generally adds a new dimension to my hobby as an astronomical imager.
Tuesday, July 14, 2015
An experimental 3D-study of an emission nebula NGC 1491
This is an experimental test with a 3D-conversion of my astronomical image. Only real elements from the original image are used, there is nothing added but the estimated volumetric information!
NOTE. This is a personal vision about shapes and volumes, based on some scientific data, deduction and an artistic impression.
My original photo of the NGC 1491
click for a large image

An animated GIF
Please, let the animation load to see it smoothly (~7,5MB)
Info about the technique used
Due to huge distances, real parallax can't be imaged in most of the astronomical objects.
I have developed an experimental technique to convert my astropics to a artificial volumetric models.
My 3-D experiments are a mixture of science and an artistic impression. I collect distance and other information before I do my 3-D conversion. Usually there are known stars, coursing the ionization, so I can place them at right relative distance. If I know a distance to the nebula, I can fine tune distances of the stars so, that right amount of stars are front and behind of the object.
I use a “rule of thumb” method for stars: brighter is closer, but if a real distance is known, I'm using that. Many 3-D shapes can be figured out just by looking carefully the structures in nebula, such as dark nebulae must be at front of the emission nebulae in order to show up etc...
The general structure of many star forming regions is very same, there is a group of young stars, as an open cluster inside of the nebula. The stellar wind from the stars is then blowing the gas away around the cluster and forming a kind of cavitation – or a hole — around it. The pillar-like formations in the nebula must point to a source of stellar wind, for the same reason.
How accurate the final model is, depends how much I have known and guessed right. The motivation to make those 3-D-studies is just to show, that objects in the images are not like paintings on the canvas but really three dimensional objects floating in the three dimensional space. This generally adds a new dimension to my hobby as an astronomical imager.
Sunday, July 12, 2015
An experimental 3D-study, Sharpless 115 Nebula in Cygnus
This is an experimental test with a 3D-conversion of my astronomical image. Only real elements from the original image are used, there is nothing added but the estimated volumetric information!
NOTE. This is a personal vision about shapes and volumes, based on some scientific data, deduction and an artistic impression.
My original photo of the Sharpless 115 (Sh2-115)
click for a large image
 A blog post about this photo, with technical details, can be seen HERE
An animated GIF

VIDEO 1
NOTE. This is a personal vision about shapes and volumes, based on some scientific data, deduction and an artistic impression.
My original photo of the Sharpless 115 (Sh2-115)
click for a large image
An animated GIF
VIDEO 1
This is a looped video, click to start and stop. Original movie is in HD720p resolution.
Info about the technique used
Due to huge distances, real parallax can't be imaged in most of the astronomical objects.
I have developed an experimental technique to convert my astropics to a artificial volumetric models.
My 3-D experiments are a mixture of science and an artistic impression. I collect distance and other information before I do my 3-D conversion. Usually there are known stars, coursing the ionization, so I can place them at right relative distance. If I know a distance to the nebula, I can fine tune distances of the stars so, that right amount of stars are front and behind of the object.
I use a “rule of thumb” method for stars: brighter is closer, but if a real distance is known, I'm using that. Many 3-D shapes can be figured out just by looking carefully the structures in nebula, such as dark nebulae must be at front of the emission nebulae in order to show up etc...
The general structure of many star forming regions is very same, there is a group of young stars, as an open cluster inside of the nebula. The stellar wind from the stars is then blowing the gas away around the cluster and forming a kind of cavitation – or a hole — around it. The pillar-like formations in the nebula must point to a source of stellar wind, for the same reason.
How accurate the final model is, depends how much I have known and guessed right. The motivation to make those 3-D-studies is just to show, that objects in the images are not like paintings on the canvas but really three dimensional objects floating in the three dimensional space. This generally adds a new dimension to my hobby as an astronomical imager.
Saturday, July 11, 2015
An experimental 3D-study of the Pelican Nebula in Cygnus
This is an experimental test with a 3D-conversion of my astronomical image. Only real elements from the original image are used, there is nothing added but the estimated volumetric information!
NOTE. This is a personal vision about shapes and volumes, based on some scientific data, deduction and an artistic impression.
My original photo of the Pelican Nebula
click for a large image
 A blog post about this photo, with technical details, can be seen HERE
An animated GIF

VIDEO 1
VIDEO 2
NOTE. This is a personal vision about shapes and volumes, based on some scientific data, deduction and an artistic impression.
My original photo of the Pelican Nebula
click for a large image
An animated GIF
VIDEO 1
This is a looped video, click to start and stop. Original movie is in HD720p resolution.
VIDEO 2
This is a looped video, click to start and stop. Original movie is in HD720p resolution.
Info about the technique used
Due to huge distances, real parallax can't be imaged in most of the astronomical objects.
I have developed an experimental technique to convert my astropics to a artificial volumetric models.
My 3-D experiments are a mixture of science and an artistic impression. I collect distance and other information before I do my 3-D conversion. Usually there are known stars, coursing the ionization, so I can place them at right relative distance. If I know a distance to the nebula, I can fine tune distances of the stars so, that right amount of stars are front and behind of the object.
I use a “rule of thumb” method for stars: brighter is closer, but if a real distance is known, I'm using that. Many 3-D shapes can be figured out just by looking carefully the structures in nebula, such as dark nebulae must be at front of the emission nebulae in order to show up etc...
The general structure of many star forming regions is very same, there is a group of young stars, as an open cluster inside of the nebula. The stellar wind from the stars is then blowing the gas away around the cluster and forming a kind of cavitation – or a hole — around it. The pillar-like formations in the nebula must point to a source of stellar wind, for the same reason.
How accurate the final model is, depends how much I have known and guessed right. The motivation to make those 3-D-studies is just to show, that objects in the images are not like paintings on the canvas but really three dimensional objects floating in the three dimensional space. This generally adds a new dimension to my hobby as an astronomical imager.
Thursday, July 9, 2015
An experimental 3D-study of the IC 1795
This is an experimental test with a 3D-conversion of my astronomical image. Only real elements from the original image are used, there is nothing added but the estimated volumetric information!
NOTE. This is a personal vision about shapes and volumes, based on some scientific data, deduction and an artistic impression.
My original photo of the IC 1795 in the Heart Nebula
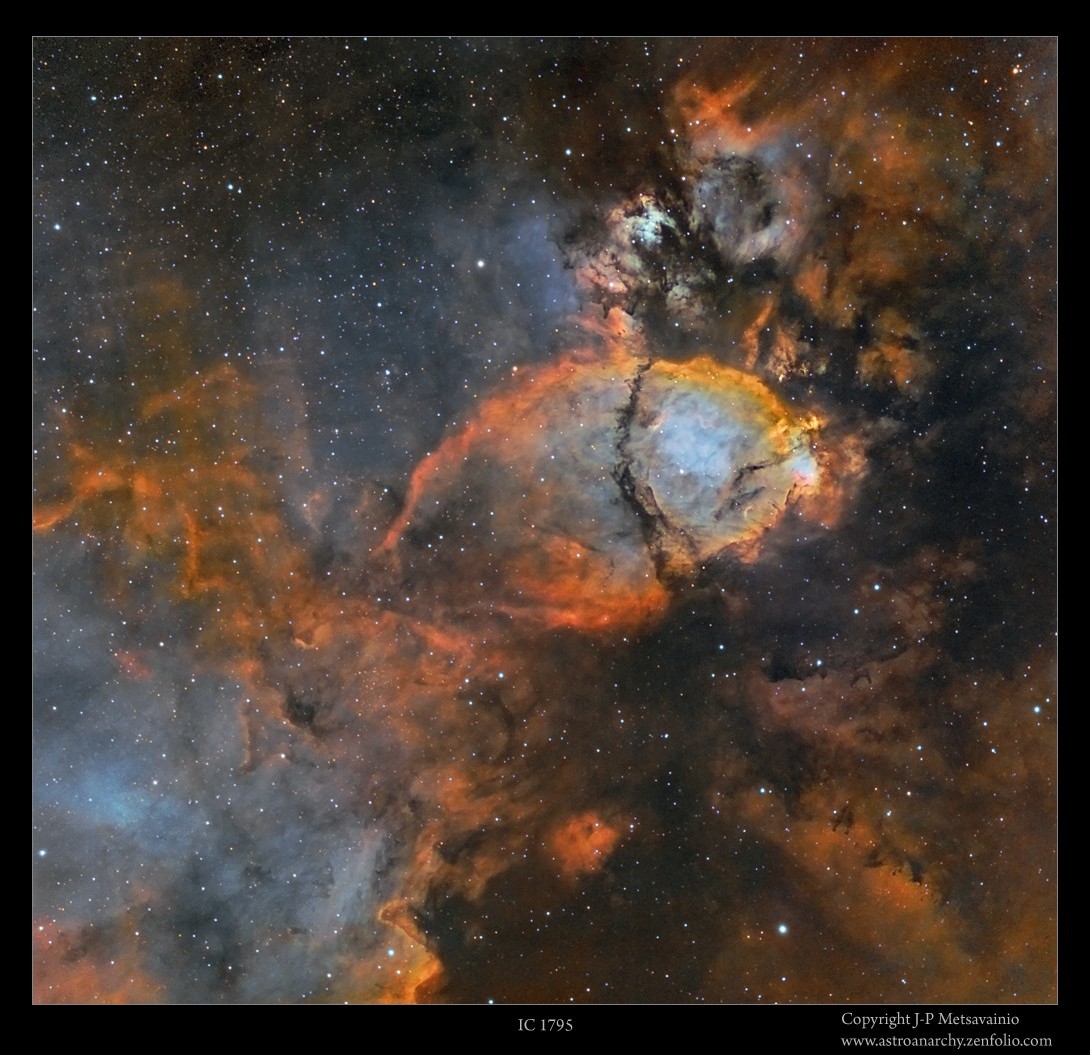
A blog post about this photo, with technical details, can be seen HERE
3D-study as a Video
This is a looped video, click to start and stop. Original movie is in HD720p resolution.
A simple animated GIF

Info about the technique used
Due to huge distances, real parallax can't be imaged in most of the astronomical objects.
I have developed an experimental technique to convert my astropics to a artificial volumetric models.
My 3-D experiments are a mixture of science and an artistic impression. I collect distance and other information before I do my 3-D conversion. Usually there are known stars, coursing the ionization, so I can place them at right relative distance. If I know a distance to the nebula, I can fine tune distances of the stars so, that right amount of stars are front and behind of the object.
I use a “rule of thumb” method for stars: brighter is closer, but if a real distance is known, I'm using that. Many 3-D shapes can be figured out just by looking carefully the structures in nebula, such as dark nebulae must be at front of the emission nebulae in order to show up etc...
The general structure of many star forming regions is very same, there is a group of young stars, as an open cluster inside of the nebula. The stellar wind from the stars is then blowing the gas away around the cluster and forming a kind of cavitation – or a hole — around it. The pillar-like formations in the nebula must point to a source of stellar wind, for the same reason.
How accurate the final model is, depends how much I have known and guessed right. The motivation to make those 3-D-studies is just to show, that objects in the images are not like paintings on the canvas but really three dimensional objects floating in the three dimensional space. This generally adds a new dimension to my hobby as an astronomical imager.
Thursday, June 25, 2015
An experimental 3D-study of the NGC 2174, the Monkey Head Nebula
This is an experimental test with a 3D-conversion of my astronomical image. Only real elements from the original image are used, there is nothing added but the volumetric information!
NOTE. This is a personal vision about shapes and volumes, based on some scientific data and an artistic impression.
The original 2D-image of NGC 2175
 A blog post about this photo, with technical details, can be seen HERE
Video1 of NGC 2175
Video2 of NGC 2175
An animated GIF

A screenshot of the 3D-model
 A 3D-mesh was used as a body for the animated image, there are no textures yet applied in the model.
NOTE. This is a personal vision about shapes and volumes, based on some scientific data and an artistic impression.
The original 2D-image of NGC 2175

Video1 of NGC 2175
This is a looped video, click to start and stop. Original movie is in HD720p resolution.
Video2 of NGC 2175
This is a looped video, click to start and stop. Original movie is in HD720p resolution.
An animated GIF

Info about the technique used
Due to huge distances, real parallax can't be imaged in most of the astronomical objects.
I have developed an experimental technique to convert my astropics to a artificial volumetric models.
My 3-D experiments are a mixture of science and an artistic impression. I collect distance and other information before I do my 3-D conversion. Usually there are known stars, coursing the ionization, so I can place them at right relative distance. If I know a distance to the nebula, I can fine tune distances of the stars so, that right amount of stars are front and behind of the object.
I use a “rule of thumb” method for stars: brighter is closer, but if a real distance is known, I'm using that. Many 3-D shapes can be figured out just by looking carefully the structures in nebula, such as dark nebulae must be at front of the emission nebulae in order to show up etc...
The general structure of many star forming regions is very same, there is a group of young stars, as an open cluster inside of the nebula. The stellar wind from the stars is then blowing the gas away around the cluster and forming a kind of cavitation – or a hole — around it. The pillar-like formations in the nebula must point to a source of stellar wind, for the same reason.
How accurate the final model is, depends how much I have known and guessed right. The motivation to make those 3-D-studies is just to show, that objects in the images are not like paintings on the canvas but really three dimensional objects floating in the three dimensional space. This generally adds a new dimension to my hobby as an astronomical imager.
A screenshot of the 3D-model

Wednesday, June 17, 2015
Just for fun, a rocket launch seen from my hometown Oulu, Finland
I made this image manipulation to show the actual scale of the Saturn rocket in everyday environment.
Image shows my hometown from the marketplace and there is a map attached showing the locations.
The Height of the Apollo rocket is around 110m. The church, seen at left in the image, is about 54m high.
A Saturn V launch from Oulu
Click for a large photo

The Map

PS.
Other well known landmarks seen in Oulu at scale
Cheops Pyramid
Click for a large photo

The Empire State Building
Click for a large photo

Monday, April 27, 2015
A video out of my astronomical photos
I made a video clip out of my astronomical nature photographs, the movie is in full HD-format.
Please, click start and use a gear symbol at the bottom right of the video window menu, select 1080p HD quality. Then select the full screen mode by using the rightmost symbol.
A 14 minute movie by J-P Metsavainio
Click to start and stop the movie
Some links to my work as an astrophotographer
Some links to my work as an astrophotographer
Portfolio: http://astroanarchy.zenfolio.com/
Facebook: https://www.facebook.com/jp.metsavainio
Youtube channel: https://www.youtube.com/channel/UCivFr6kAAYZqMVE2doG9uDQ/videos
Saturday, April 18, 2015
B&W space, Winter 2014-15
As astronomical cameras are usually cooled grayscale CCD-cameras, color images are made by shooting each color channel through a filter. For broad band RGB images usually four filters are used Luminance and RGB-filters. Due to massive light pollution in my location, I'm specialized to a narrowband imaging, it's very effective method to shoot emission nebulae, since they are emitting light in well known wavelengths. All other light can be then filtered out and let just the right wavelength pass through. I'm using the most common combination of emission lines, a light from ionized hydrogen (H-alpha), sulfur (S-II) and oxygen (O-III).
The strongest emission line is usually the H-alpha, it has most of the details also. I'm publishing here a collection of H-alpha images from the Winter season 2014-15. Sometimes B&W images can be very beautiful.
A collection of selected B&W H-alpha nebulae, Winter 2014-15
click for a large imagePelican Nebula

Pickering's Triangle in O-III light only

NGC 281

Sharpless 132

Tulip Nebula

IC 405

IC 410

IC 1805

Melotte 15

NGC 1795

NGC 1795, a blog post HERE
NGC 2175

Tuesday, April 14, 2015
Exhibition in Galleria Kajaste, Oulu, Finland
My first art gallery exhibition in Oulu, Finland.
April 8. - 26.
Wed. - Fri. 14 -19
Sat. - Sun. 12-16
Welcome!
More info about exhibition (In Finnish)
Tietoa näyttelystä suomeksi
http://www.galleriakajaste.fi/galleria/nykyinen-nayttely/

Info about the photo above
http://astroanarchy.blogspot.fi/2015/02/ic-405-flaming-star-nebula.html
Monday, April 13, 2015
Melotte 15, a new revision
I did some minor tweaking with the Heart nebula project. This is a new version out of the
Melotte 15 area at the heart of the Heart, IC 1805.
Heavenly view to the Melotte 15
Click for a large image

A 1:1 detail of the photo above
Click for a large image

The whole IC 1805 in mapped colors
Click for a high resolution photo, 2300x1900 pixels and 3MB

Melotte 15 are can be seen at the very center of the IC 1805. The original blog post about this image HERE
Subscribe to:
Posts (Atom)


