COPYRIGHT, PLEASE NOTE
All the material on this website is copyrighted to J-P Metsavainio, if not otherwise stated. Any content on this website may not be reproduced without the author’s permission.
BUY A MUSEUM QUALITY POSTER
BUY A POSTER:https://astroanarchy.zenfolio.com/
Wednesday, April 9, 2008
The Learning Curve

The term learning curve refers to a relationship between the duration of learning or experience and the resulting progress. Initially introduced in cognitive psychology, over time the term has acquired a broader interpretation, and expressions such as "experience curve", "improvement curve", "cost improvement curve", "progress curve"/"progress function", "startup curve", and "effeciency curve" are often used interchangeably, depending on the context. Some of these terms may also have other meanings.
-
(Above text is borrowed from Wikipedia)
_
This image serie is example of my leraning curve with the Galaxy M51.
-
All the images are taken with same optics, LX200 GPS 12".
-
The oldest one, 2005, is taken with Canon 300D, in Alt/Az
Image from 2007 is taken with QHY8.
Latest image is taken with QHY8 and SXV-AO, active optics.
-
The impact of imaging conficuration is not as big as
impact of the improved processing skills.
Tuesday, April 8, 2008
M13-reprocessed

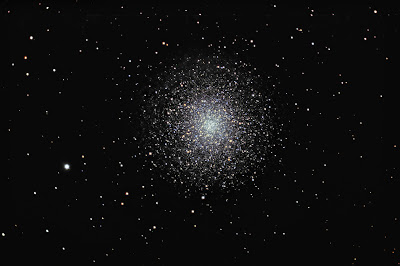
This image of M13 is from night of 07.03.2008.
I added some wavelets function to it under RegiStack4 software.
The difference is not huge, but dimmer outer stars are now better resolved.
Original M13 is here:
http://tinyurl.com/6cqfne
Imaging data can be found here:
Sunday, April 6, 2008
Stereo Technique, general notes
NOTES ABOUT IMAGE SIZE.
_
When you process the image, it should be at original resolution or moderately
scaled down.
_
After all the processing is done, image has to be scaled down for viewing.
The rule of thumb is, that distance between two images should not be large than distance between eyes.
Large the picture is, the more difficult it is to form a stereo image.
_
With the Cross Vision method, the image scale can be somehow large.
-
GENERAL NOTES OF THE METHOD USED
_
Technique precented here is different, than one I have used for my images.
The reason is, that there is now no need for professional 3D-software.
It has some limitations, but overall the actual results are more or less similar.
-
Many astro Enthusiastics have done about similar things before with stereo images.
The main difference from this method is, that methods used usually are not very suitable for complex forms, like nebulas.
They are mainly based on simple methods, where objects are moved linear way to
create pseudo 3D-effect.
-
If based on real data from objects, those images can be pretty accurate presentaions of the real phenomens.
The reason I'm interested this kind of thigs is, that this way I can see the "real" nature of the object with my own eyes, and maybe I'm able to reveal some of the hidden beauty of the targets as well
-
Labels:
research and development
Stereo image viewing instructions
-
PARALLEL VISION ISTRUCTIONS:
-
In parallel freeviewing the image for the left eye is on the left and the image for the right eye is on the right. You stare into the screen so that your eyes are aimed (more or less) parallel. As you stare into the screen you will get double vision as each eye sees the L & R images separately. When you are staring in at the right distance the middle two images will overlap and become 3d. The outer two images will remain and will still be 2d.
-
-
CROSS VISION INSTRUCTIONS:
-
In cross eye freeviewing the image for the left eye is on the right and the image for the right eye is on the left. You stare at a point about 1/2 way to the screen so that your eye's gaze is crossing at the half way point. Thus the left eye sees the correct image which is on the right. As you cross your eyes the image will go double. When your eyes are crossed the correct amount the middle images will overlap and be in 3d. The two outer images will remain and will be in 2d.
Subscribe to:
Posts (Atom)


