
Saturday, April 23, 2016
Elephant's Trunk nebula without stars
Now and then I publish experimental starless versions of my photos. They have a special eerie feel in them but they also reveal more details in the actual nebula. I haven't developed the star removal technique just for playing with it. It's used in my Tone Mapping image processing technique as a tool. I'm also using it as a very effective tool, when I like to hunt down dim and diffused details under a dense starfield of the Milky Way.
Elephant's Trunk nebula without stars
Click for a large image

A blog post about the original version with stars and technical details, can be found from HERE.
A closeup
Click for a large image

Friday, April 22, 2016
Who turn out the lights? Sharpless 114 with and without stars
Now and then I publish experimental starless versions of my photos. They have a special eerie feel in them but they also reveal more details in the actual nebula. This time I made a small animation out of the Sharpless 114 (Sh2-114) in Eastern Cygnus.
Sharpless 114 with and without stars
To see the details, you really should click the image large!
 It's easy to see how much more details are visible in a starless version. Especially the very dim ones stand out better. A blog post about this photo, with the technical detail, can be found from HERE.
Note. The blue dot at top right is a planetary nebula Kn 26.
Why star removal?
Note. The blue dot at top right is a planetary nebula Kn 26.
Why star removal?
I haven't developed the star removal technique just for playing with it. It's used in my Tone Mapping image processing technique as a tool. I'm also using it as a tool, when I like to hunt down dim and diffused details under a dense starfield of the Milky Way.
Wednesday, April 20, 2016
Filaments of the Western Cygnus in stereo, an experimental 3D-study
Images are for two different viewing methods, the first set of images is for the Parallel Vision method and the second set for the Cross Vision method. Viewing instructions can be seen HERE.
NOTE! This is a personal vision about forms and shapes, based on some scientific facts, deduction and an artistic impression. A short explanation, about the method used for the 3D conversion of my astrophoto, at the end of this post.
Sh2-224 as a freeview stereo pairs
Click for a large image
For a parallel viewing method (Eyes parallel to each other)
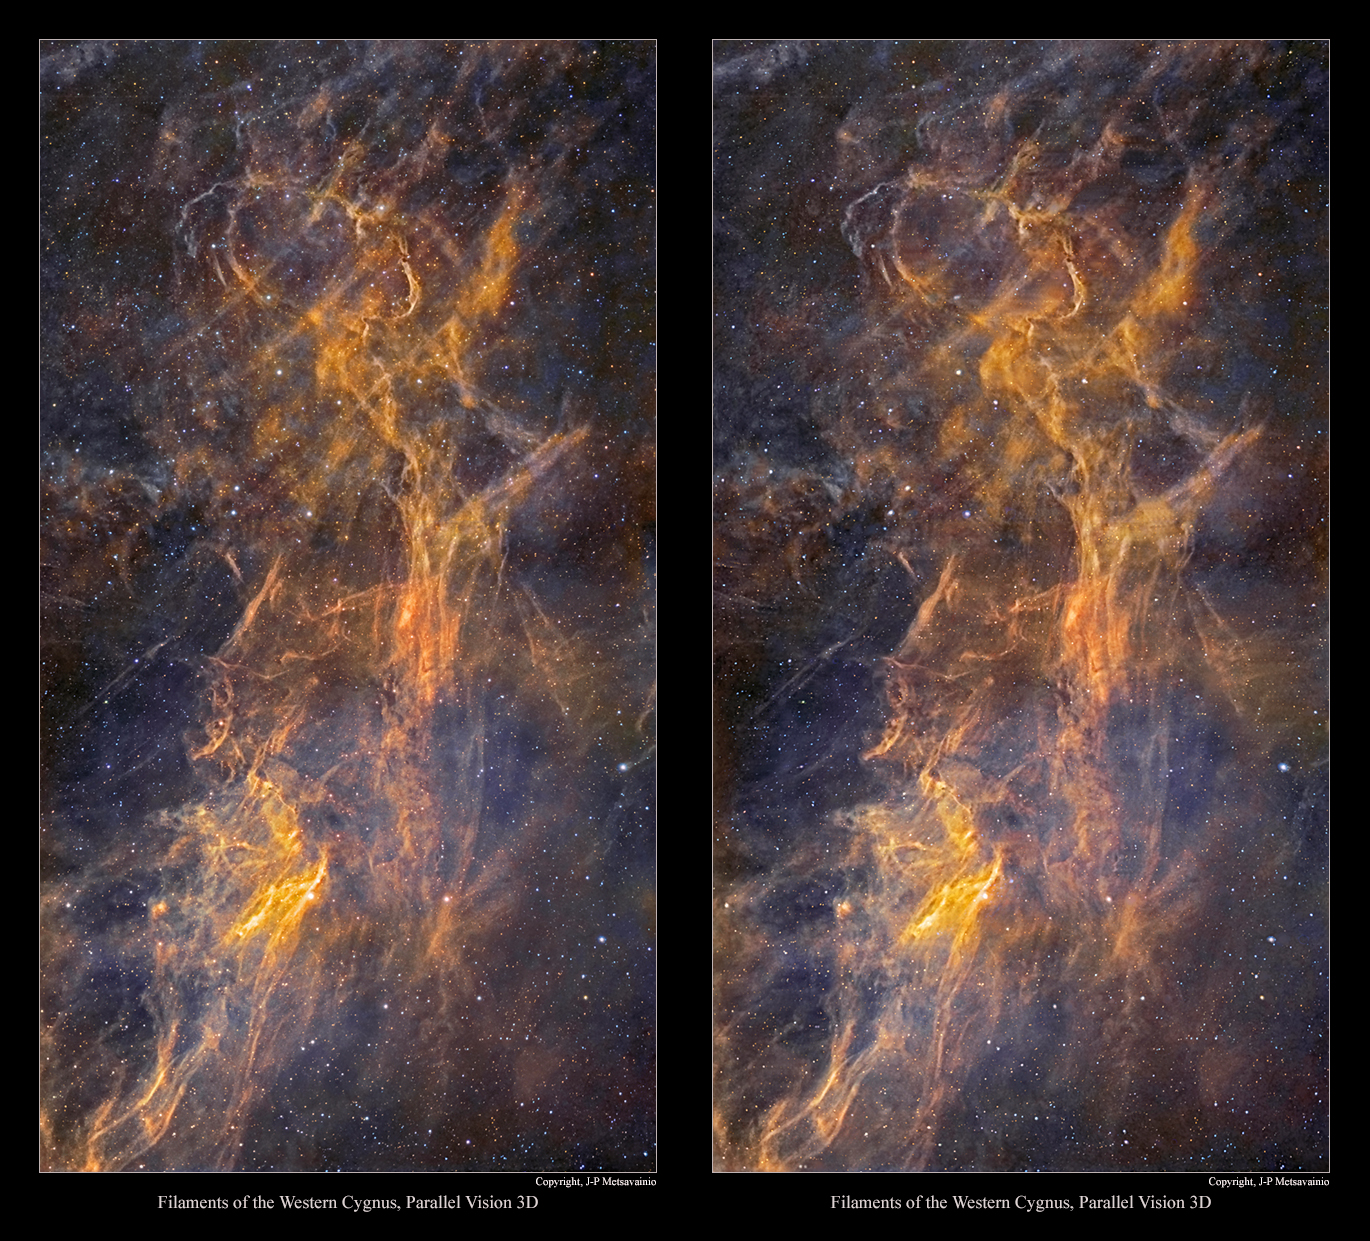
Image pair for the Parallel Vision viewing method, click for a large image.
Original 2D-image and technical details can be seen HERE.
For a cross vision viewing method (Eyes crossed)
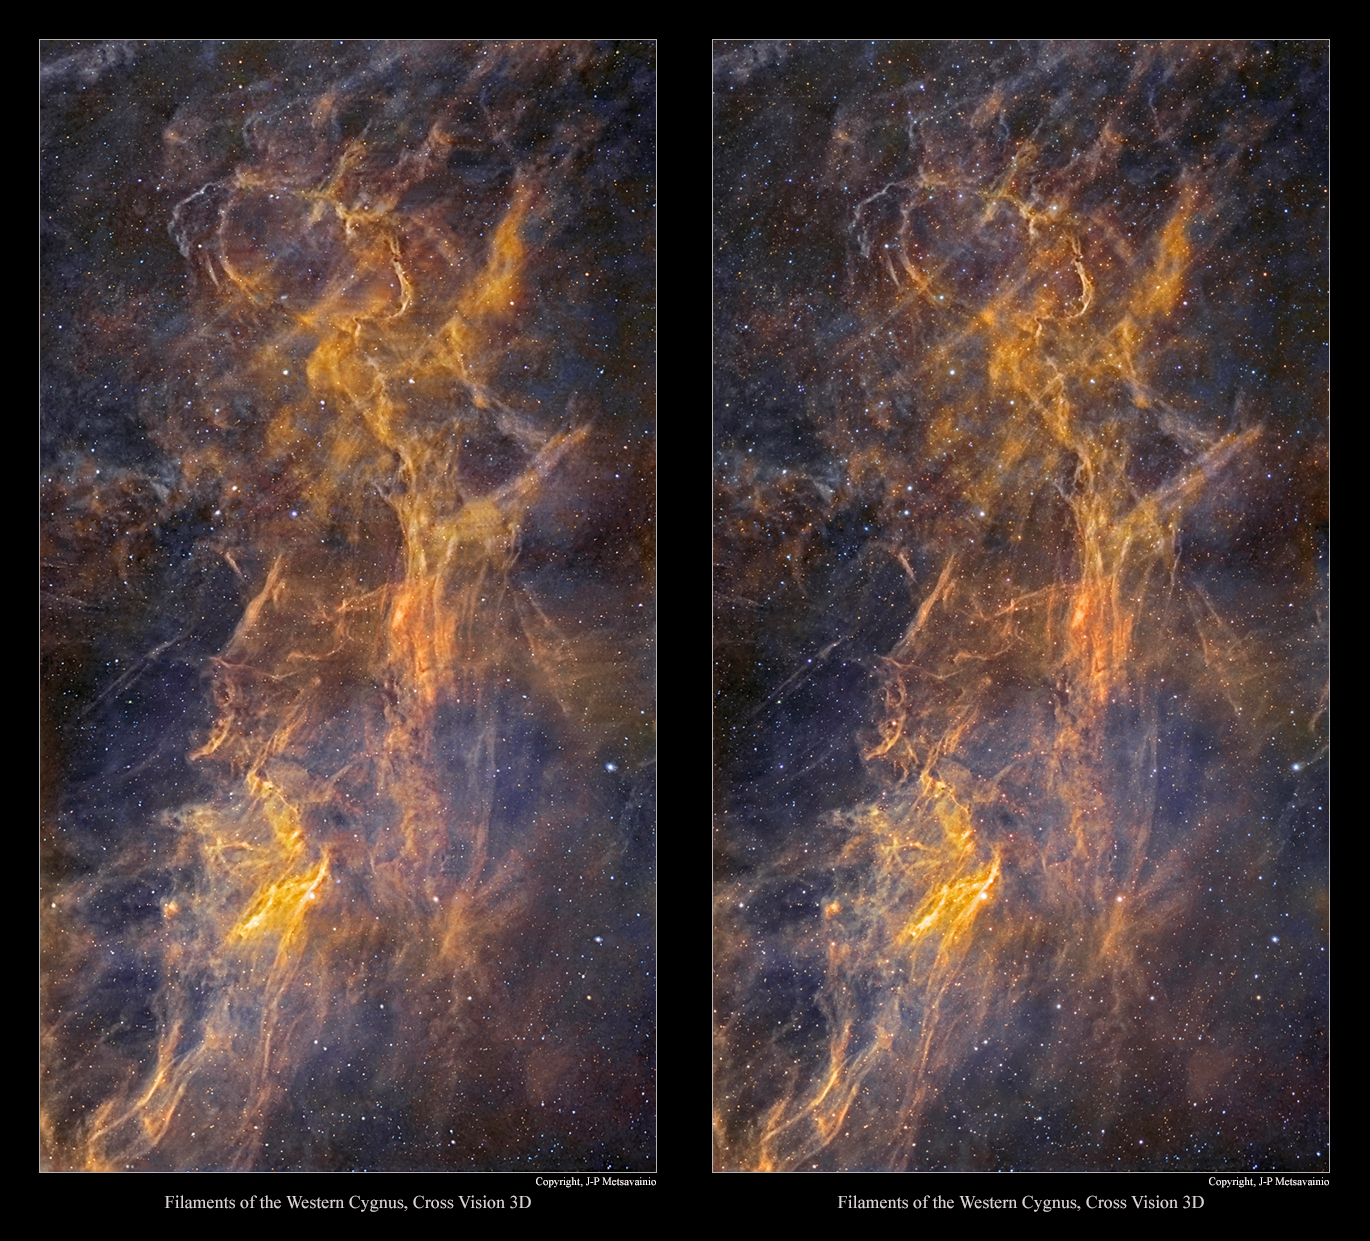
Image pair for the Cross Vision viewing method, click for a large image.
Original 2D-image and technical details can be seen HERE.
HOW?
All the original 2D-images are imaged by me, if not otherwise stated.
Due the huge distances, no real parallax can be imaged for a volumetric information.
I have developed a method to turn any 2D-astronomical image to a various 3D-formats. The result is always an approximation of the reality, based on some known scientific facts, deduction and an artistic impression.
What are the known facts?
By using a scientifically estimated distance of the object, I can organize right amount of stars front and behind the object. (as then we know the absolute position of the object at our Milky-way)
Stars are divided to groups by apparent brightness, that can be used as a draft distance indicator, brighter the closer. There is usually a known star cluster or a star(s) coursing the ionization and they can be placed in right relative position to the nebula itself .
Generally emission nebulae are not lit by the starlight directly but radiation from stars ionizing gases in the nebula. Hence the nebula itself is emitting its own light, at wavelength typical to each element. Due to that, and the thickness of the nebula can be estimated by its brightness, thicker = brighter. Nebulae are also more or less transparent, so we can see "both sides" at the same time.
Many other relative distances can be figured out just carefully studying the image, like dark nebulae must be front of bright ones. The local stellar wind, radiation pressure, from the star cluster, shapes the nebula, For that reason, pillar like formations must point to a cluster. ( Look previous image, above this text.) Same radiation pressure usually forms kind of cavitation, at the nebulosa, around the star cluster, by blowing away all the gas around the source of stellar wind. The ionized oxygen, O-III, emits blueish light, it requires lots of energy to ionize. Due to that, the blue glowing area locates usually near the source of ionization, at the heart of the nebula. This and many other small indicators can be found by carefully studying the image itself.
Using the known data, I can build a kind of skeleton model of the nebula. Then the artistic part is mixed to a scientific part, rest is very much like a sculpting.
Tuesday, April 19, 2016
An experimental starless view to the Pickering's Triangle
Now and then I publish experimental starless versions of my photos. They have a special eerie feel in them but they also reveal more details in the actual nebula. To see the details, you really should click the image large!
Pickering's Triangle SNR with no stars
Please, click for a large image, 1700 x 1500 pixels
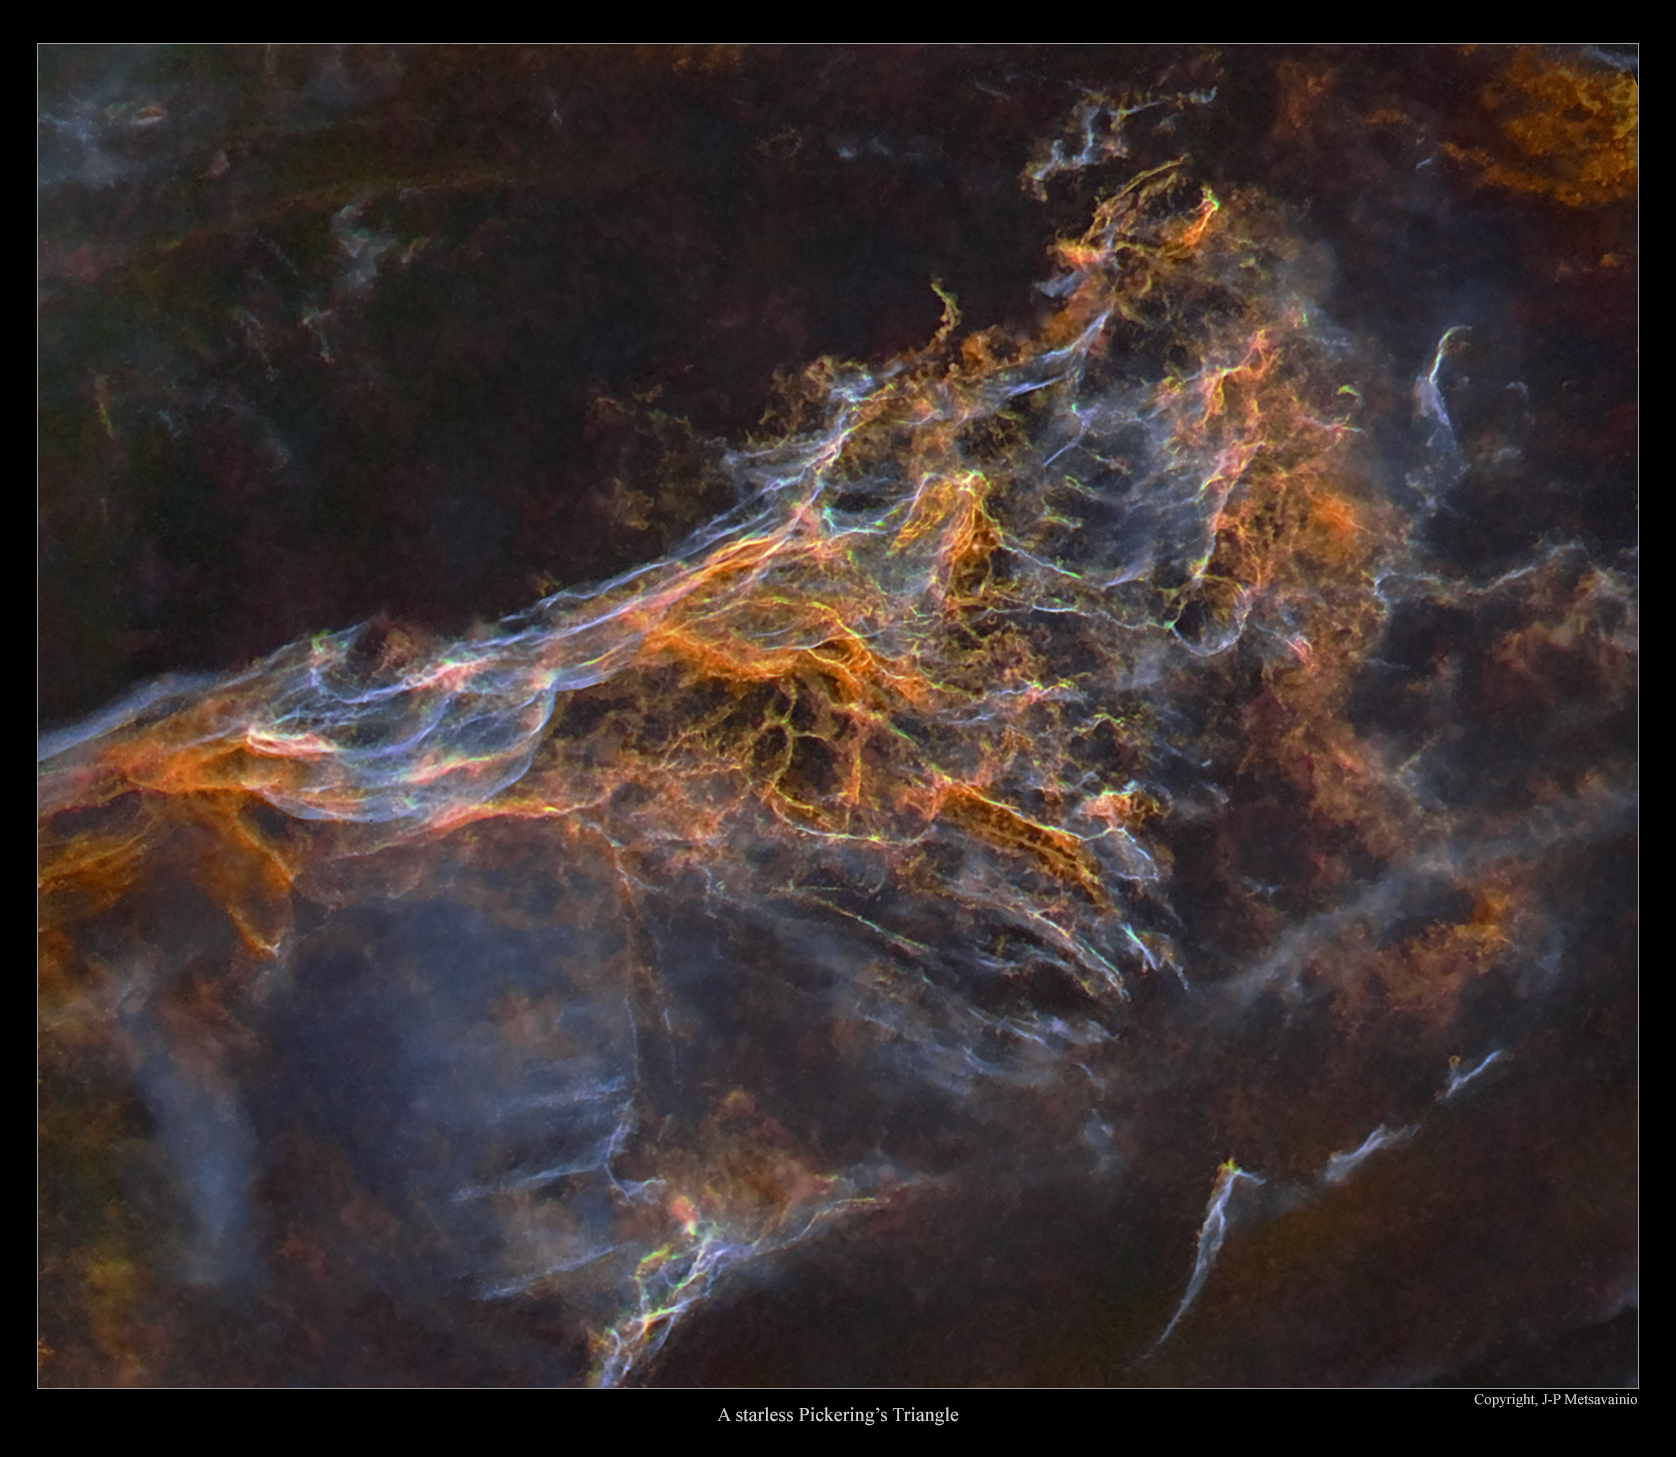 Pickering's Triangle is a part of Veil Nebula supernova remnant in Cygnus
Pickering's Triangle SNR untouched
Please, click for a large image, 1700 x 1500 pixels
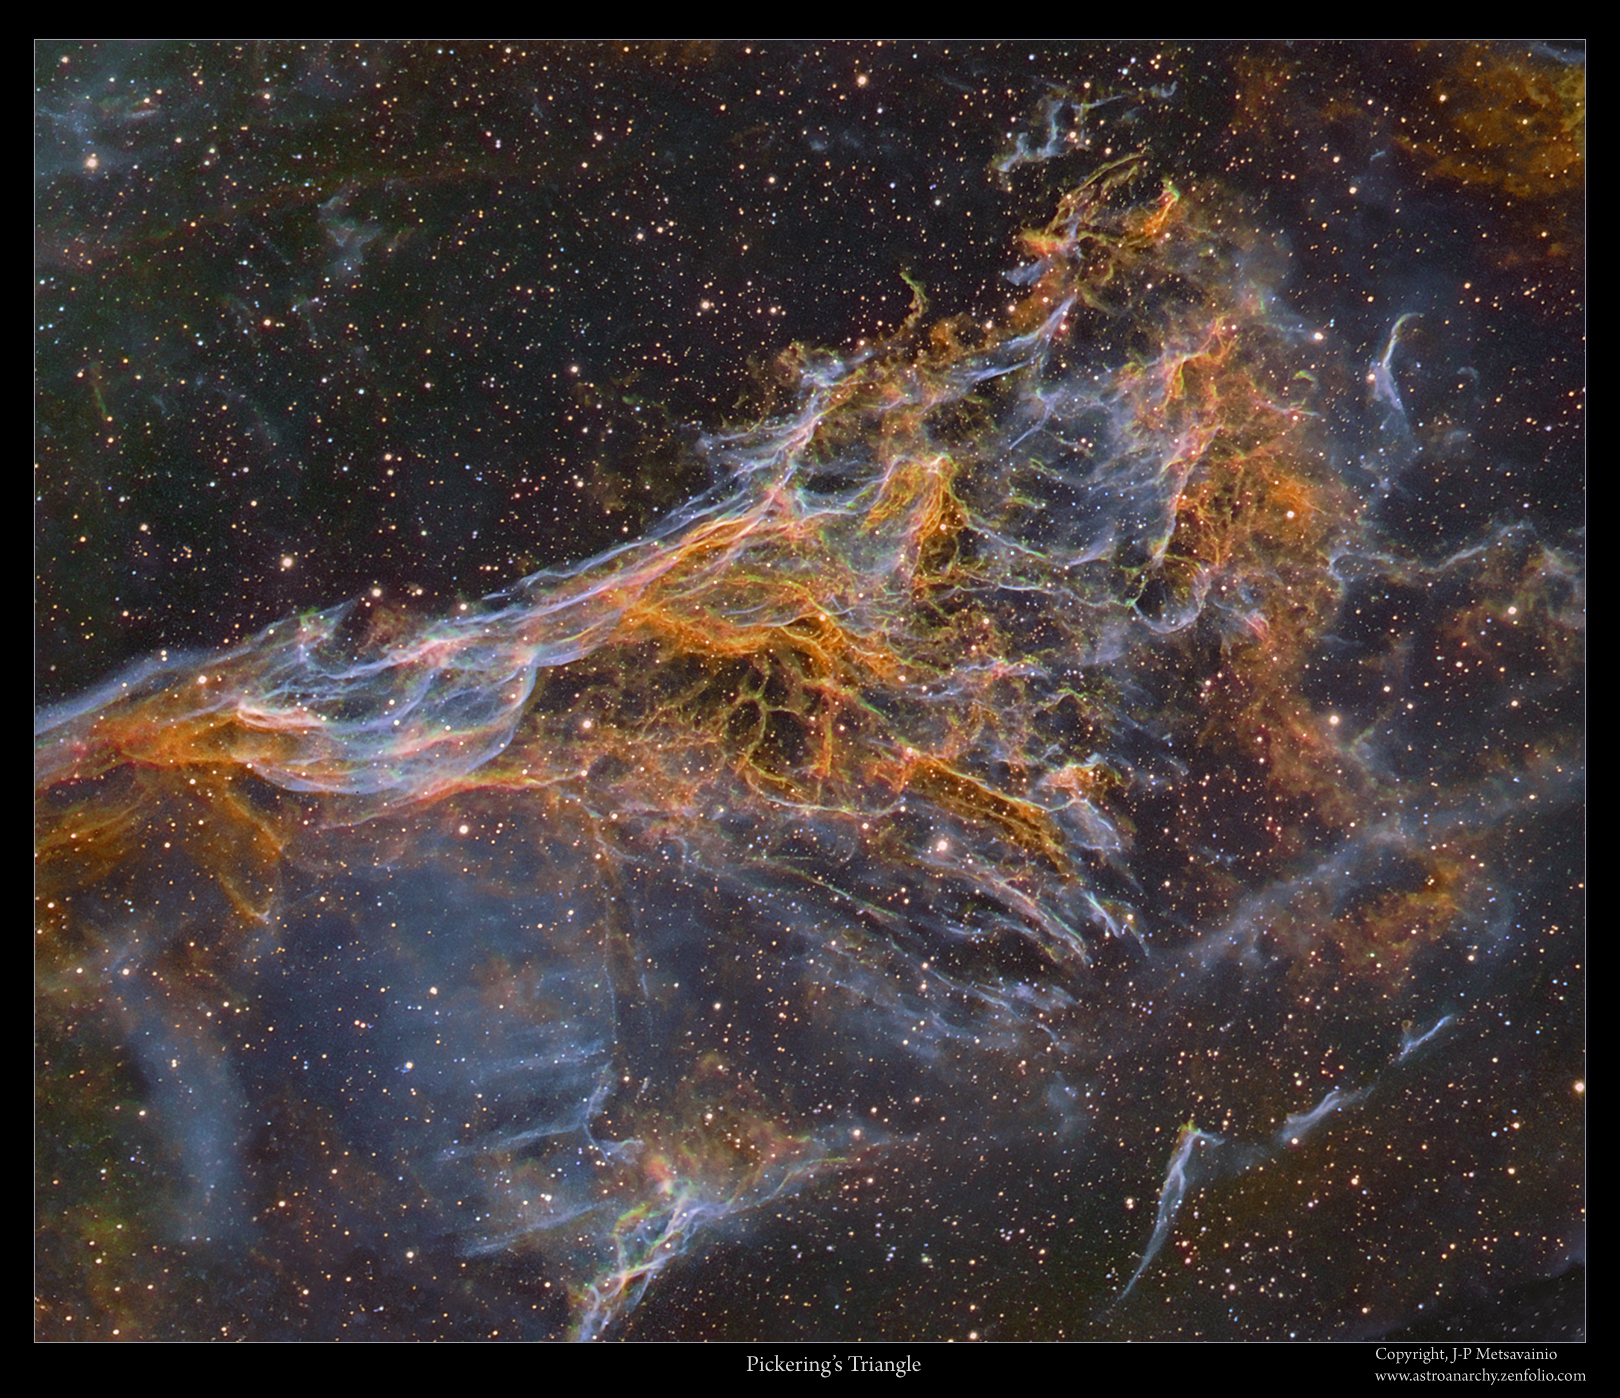 Info about this image HERE
Please, click for a large image, 1700 x 1500 pixels
Pickering's Triangle SNR untouched
Please, click for a large image, 1700 x 1500 pixels
Subscribe to:
Posts (Atom)


