
Showing posts sorted by relevance for query 3d. Sort by date Show all posts
Showing posts sorted by relevance for query 3d. Sort by date Show all posts
Thursday, January 6, 2011
Reprocessed 3D stereopairs
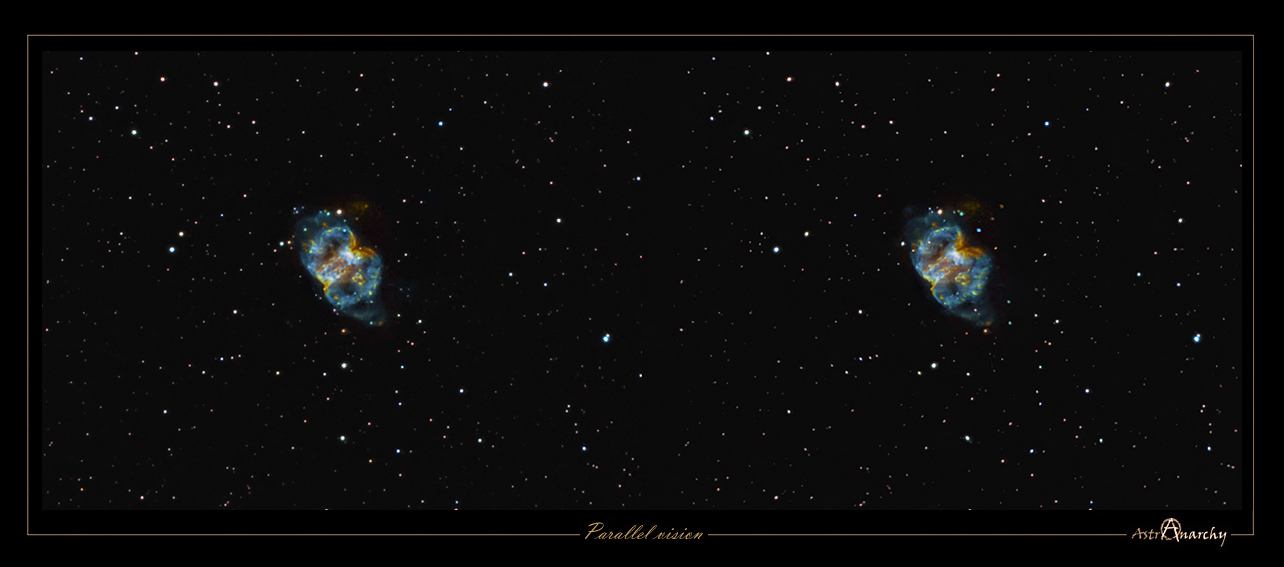
Merlotte 15

Parallel vision 3D

Cross vision 3D
Simeis 147 aka Sh2-240

Parallel vision 3D

Cross vision 3D
Original 2D-image with the technical details:
Sh2-223,224 & 225

Parallel vision 3D

Cross vision 3D
Original 2D-image with the technical details:
Other 3D-formats:
NOTE! This is a personal vision about forms and shapes, based on some known facts and an artistic impression.
Tuesday, February 9, 2010
3D-models from 2D-astro images, more testing
In this blog, there is lots of experimental material. To see my actual astroimages, please, see my Portfolio: http://astroanarchy.zenfolio.com/
Links to the original images are with animated models, there is links to other 3D-formats as well.
Animations are made by creating artificial parallax to an image. Then two images are animated together by using a very clever webservice. There can be some artifacts in images, due the experimental nature of this work! The volumetric models are based on some known facts and an artistic impression.
Please, let the images load for few seconds to see them animated!
Flaming Star nebula and IC 410

Other 3D-formats HERE
Cone Nebula area

Other 3D-formats HERE
Rosette Nebula area

Other 3D-formats HERE
Butterfly Nebula

Other 3D-formats HERE
Tulip Nebula wide field

Other 3D-formats HERE
NGC 1499, the California Nebula

Other 3D-formats HERE
This has been a very poor winter for astro imaging, playing with old data is one way to try avoid frustration.
We have just two and half months imaging season left up here in 65N. After that no astronomical darkness here until late in the next Autumn : (
Tuesday, June 1, 2010
M16, the "Eagle nebula" as a 3D stereo pair

Parallel vision

Cross vision
Other 3D-formats can be found here:
Original 2D-image:
NOTE! This is a personal vision about forms and shapes, based on some known facts and an artistic impression.
Viewing instructions can be found from a Right hand side menu.
HOW?
I have been asked many times, how my 3D-images are done, so here it goes!
Viewing instructions can be found from a Right hand side menu.
HOW?
I have been asked many times, how my 3D-images are done, so here it goes!
All the original 2D-images are imaged by me.
Due the huge distances, no real parallax can be imaged to form a volumetric information.
I have developed a method to turn any 2D-astronomical image to a various 3D-formats. The result is always approximation of the reality, based on some known facts and an artistic impression.
What are the known facts?
By using a scientifically estimated distance of the object, I can organize right amount of stars front and behind the object.
(as then we know the absolute position of an object at our Milky-way)
There usually is a known star cluster or a star(s) coursing the ionization and stars can be placed in right relative position to the nebula itself .
Stars are divided to groups by apparent brightness, that can be used as a draft distance indicator, brighter the closer.
The nebula itself is emitting its own light, when ionized, typical to each element.
The thickness of the nebula can be estimated by its brightness.
Many other relative distances can be figured out just carefully studying the image, like dark nebulae must be front of bright ones.
The local stellar wind, radiation pressure, from the star cluster shapes the nebulae, pillar like formations must then point to a cluster for that reason.
Same radiation pressure usually forms kind of cavitation hole at the nebulosa, around the star cluster, by blowing away all the gas around it.
Same radiation pressure usually forms kind of cavitation hole at the nebulosa, around the star cluster, by blowing away all the gas around it.
Many other small indicators can be found from the image itself.
The artistic part is then mixed to a scientific part, rest is very much like a sculpting.
I have published a, little simplified, step by step tutorial about turning astronomical images to a 3D-stereo pairs under a PhotoShop. It can be found from here as a PDF: astroanarchy.blogspot.com/2009/04/neaic.html
WHY?
Firstly, they are great fun to do. Secondly, because I can.
3D-experiments seems to increase a public interest to a subject, as you might have noticed.
Personally, I have studied my astronomical images much deeper, than ever without 3D-modeling.
The 3D-studies have really add a new dimension to my hobby as an astronomical photographer. (pun intended)
Friday, April 15, 2011
Collection of anaglyph Red/Cyan 3D-nebulae still motion movies

Behind a link above, there is a collection of anaglyph 3D-movies.
I made this set, since original 3D-images are in very high resolution. By this way, I can show both, the full image and details. Still motion technique used, gives some new life to a static images.
Original movies are in HD-1080p (1920x1080 pixels), resolution. For web, the movies are reduced to
HD-420p resolution and are more compressed.
A collection of Anaglyph 3D still images can be seen here:
http://astroanarchy.zenfolio.com/p532254131
A collection of Anaglyph 3D still images can be seen here:
http://astroanarchy.zenfolio.com/p532254131
Note! You'll need a pair of Red/Cyan eyeglasses to be able to tee the movie and images as a 3D-one.
There is a direct link to a 3D-movie collection in a top bar of my portfolio, "anaglyph 3D movies".
Thursday, November 1, 2012
An experimental 3D-animation of the Lagoon Nebula, M8
I have tested a new method to publish my 3D-images as a form of Lenticular prints.
For this technique to work, I need series of images from different angles, in this case 24 images are needed.
Lenticular printing is actually an old technique but in past few years it has become much more sophisticated.
The results can be stunning visually, image plane disappears and object floats in and outside of the frame.
Since astronomical objects are too far away, no real parallax can be imaged. Doe to that, I have developed a method to turn my images to various 3D-formats. My work flow is based on scientific data from the object, distance and the source of ionization are usually known. The different types of the nebulae has typical structures, pillar like formations must point to the source of ionization, the radiation pressure forms kind of hollow area, inside of the nebula, around newly born stars, dark nebulae must be at front of the emission ones to show, etc... rest of the missing information is then replaced with an artistic vision.
The whole process is pretty much like sculpting!
Lagoon Nebula, Messier 8, as an animation
NOTE. Only real data from the original 2D-image is used for the 3D-animation!
Generally images about space objects shows them flat as a paintings in a canvas but in reality, they are volumes floating in three dimensional space. The purpose of my work is to show how I personally see those distant objects in my mind and they are fun to do!
The accuracy of the model depends how well I have known, figured out and guessed. Right or wrong, if my 3D experiments are giving something to think, they are working well.
Original 2D-image used for the animation

Technical details and information of M8 can be seen in this blog post:
http://astroanarchy.blogspot.fi/2010/06/m8-lagoon-nebula.html
My previous GIF-animations can be seen here:
IC 1396, http://www.astroanarchy.blogspot.fi/2012/10/an-experimental-3d-animation-from-my.html
NGC 6752, http://www.astroanarchy.blogspot.fi/2012/10/an-experiental-3d-animation-from-my_15.html
Veil Nebula, http://www.astroanarchy.blogspot.fi/2012/10/an-experiental-3d-animation-from-my.html

Saturday, April 16, 2016
An experimental 3D-study of the NGC 1499, the California Nebula
Images are for two different viewing methods, the first set of images is for the Parallel Vision method and the second set for the Cross Vision method. Viewing instructions can be seen HERE.
NOTE! This is a personal vision about forms and shapes, based on some scientific facts, deduction and an artistic impression. A short explanation, about the method used for the 3D conversion of my astrophoto, at the end of this post.
NGC 1499 as a freeview stereo pairs
For a parallel viewing method (Eyes parallel to each other)

Original 2D-image and technical details can be seen HERE.
For a cross vision viewing method (Eyes crossed)

Original 2D-image and technical details can be seen HERE.
HOW?
I have been asked many times, how my 3D-images are done, so here it goes!
All the original 2D-images are imaged by me, if not otherwise stated.
Due the huge distances, no real parallax can be imaged for a volumetric information.
I have developed a method to turn any 2D-astronomical image to a various 3D-formats. The result is always an approximation of the reality, based on some known scientific facts, deduction and an artistic impression.
What are the known facts?
By using a scientifically estimated distance of the object, I can organize right amount of stars front and behind the object. (as then we know the absolute position of the object at our Milky-way)
Stars are divided to groups by apparent brightness, that can be used as a draft distance indicator, brighter the closer. There is usually a known star cluster or a star(s) coursing the ionization and they can be placed in right relative position to the nebula itself .
Generally emission nebulae are not lit by the starlight directly but radiation from stars ionizing gases in the nebula. Hence the nebula itself is emitting its own light, at wavelength typical to each element. Due to that, and the thickness of the nebula can be estimated by its brightness, thicker = brighter. Nebulae are also more or less transparent, so we can see "both sides" at the same time.
Many other relative distances can be figured out just carefully studying the image, like dark nebulae must be front of bright ones. The local stellar wind, radiation pressure, from the star cluster, shapes the nebula, For that reason, pillar like formations must point to a cluster. ( Look previous image, above this text.) Same radiation pressure usually forms kind of cavitation, at the nebulosa, around the star cluster, by blowing away all the gas around the source of stellar wind. The ionized oxygen, O-III, emits blueish light, it requires lots of energy to ionize. Due to that, the blue glowing area locates usually near the source of ionization, at the heart of the nebula. This and many other small indicators can be found by carefully studying the image itself.
Using the known data, I can build a kind of skeleton model of the nebula. Then the artistic part is mixed to a scientific part, rest is very much like a sculpting.
WHY?
Firstly, they are great fun to do. Secondly, just because I can.
Many times images of nebulae looks like paintings on the canvas. I like to show a real nature of those distant objects as a three dimensional shapes floating in a three dimensional volume. This is a great way to show, how I personally see astronomical targets as a 3D-forms inside my head.
3D-experiments seems to increase a public interest to a subject, as you might have noticed.
I have studied my astronomical images much deeper, than ever without 3D-modeling.
3D-studies has really added a new dimension to my work as an astronomical photographer. (pun intended)

Monday, October 4, 2021
Three 3D-conversions out of my astronomical photos
I have made dozens of 3D-conversions out of my astronomical photos. As an artist I like to find a new views to the reality. My models are not just a guesswork, the conversion is based on real scientific data.
At the end of this blog post there is a short explanation, how I do my conversion work.
Veil nebula in O-III light alone
 Original astronomical photo about part of the Veil nebula SNR in O-III light only.

3D-study of Veil Nebula Photo
NGC1499 the California Nebula

My photo of California Nebyla in mapped colors
3D-study of California Nebula Photo
Bubble Nebula

3D-study of Bubble Nebula Photo
How 3D-models are made My Moleskine notebook pages from 2008, I planned how to convert nebulae to 3D
How accurate my 3-D-visions are depending on how much information I have and how well I implement it.
The final 3-D-image is always an appraised simulation of reality based on known scientific facts, deduction, and some artistic creativity.
After I have collected all the necessary scientific information about my target, I start my 3-D conversion from stars. Usually there is a recognizable star cluster which is responsible for ionizing the nebula. We don’t need to know its absolute location since we know its relative location. Stars ionizing the nebula have to be very close to the nebula structure itself. I usually divide up the rest of the stars by their apparent brightness, which can then be used as an indicator of their distances, brighter being closer. If true star distances are available, I use them, but most of the time my rule of thumb is sufficient. By using a scientific estimate of the distance of the Milky Way object, I can locate the correct number of stars in front of it and behind it.
Emission nebulae are not lit up directly by starlight; they are usually way too large for that. Rather, stellar radiation ionizes elements within the gas cloud and the nebula itself is glowing light, the principle is very much the same as in fluorescent tubes. The thickness of the nebula can be estimated from its brightness, since the whole volume of gas is glowing, brighter means thicker.
By this means, forms of the nebula can be turned to a real 3-D shape. Nebulae are also more or less transparent, so we can see both sides of it at the same time, and this makes model-making a little easier since not much is hidden.
The local stellar wind, from the star cluster inside the nebula, shapes the nebula by blowing away the gas around the star cluster. The stellar wind usually forms a kind of cavity in the nebulosity. The same stellar wind also initiates the further collapse of the gas cloud and the birth of the second generation of stars in the nebula. The collapsing gas can resist the stellar wind and produces pillar like formations which must point to a cluster.
Ionized oxygen (O-III) glows with a bluish light, and since oxygen needs a lot of energy to ionize it, this can only be achieved relatively close to the star cluster in the nebula. I use this information to position the O-III area (the bluish glow) at the correct distance relative to the heart of the nebula.
Many other small indicators can be found by carefully studying the image itself. For example, if there is a dark nebula in the image, it must be located in front of the emission one, otherwise we couldn’t see it at all.
Using the known data in this way I build a kind of skeleton model of the nebula. Then the artistic part is mixed with the scientific and logical elements, and after that the rest is very much like creating a sculpture on a cosmic scale

Saturday, May 14, 2011
Two globular clusters as a 3D stereo pairs, reprocessed
Tucanae 47
Globular cluster in constellation Tucana.


Other 3D-formats:
NGC 6752
A globular cluster in constellation Pavo.

Parallel vision 3D

Cross vision 3D
Other 3D-formats:
Original 2D:
NOTE! This is a personal vision about forms and shapes, based on some known facts and an artistic impression.
Thursday, August 26, 2010
A collection of astronomical movies from my images
All movies are published before in this blog. There has been very few viewers for them though, so I think reposting might be a good idea.
DEEP SKY TARGETS
Veil nebula as a 3D-transformation:
http://astroanarchy.blogspot.com/2009/12/new-version-about-veil-animation.html
Zoom in movies of Bubble and Soul nebulae:
http://astroanarchy.blogspot.com/2009/12/zoom-in-movie-test.html
Bubble nebula zoom out movie:
http://astroanarchy.blogspot.com/2010/01/bubble-zoomout.html
Heart nebula zoom out movie:
http://astroanarchy.blogspot.com/2010/01/hear-nebula-zoomout.html
Zoom out movies from Tulip and Crescent nebulae and Moon:
http://astroanarchy.blogspot.com/2010/01/three-new-zoomout-movies.html
IC410 and IC405 zoom in movie:
http://astroanarchy.blogspot.com/2010/01/ic-410-and-ic-405-as-zoomin-movie.html
M27 as a 3D-transformation movie:
http://astroanarchy.blogspot.com/2010/04/m27-experimental-3d-videos.html
Soul nebula 3D-conversion test:
http://astroanarchy.blogspot.com/2009/12/3d-conversion-testing.html
THE MOON
All Moon movies are made by re-projecting 2D-Moon image to a sphere. After that, the observation location can be freely selected, as long the area of interest stay on the visible area. I like this technique a lot, since the original image stays unprocessed!
Experimental Moon movies:
http://astroanarchy.blogspot.com/2009/05/new-video-material-from-astrotargets.html
(There is a movie of Andromeda galaxy as well)
A movie about principle of making Moon movies from 2D-material:
http://astroanarchy.blogspot.com/2009/06/how-to-3d-moon-movie.html
Moon movie experiments:
http://astroanarchy.blogspot.com/2009/06/more-experiments-with-3d-transform.html
Moon surface fly over movie:
http://astroanarchy.blogspot.com/2009/06/moon-surface-movie-from-2d-image.html
Thursday, December 9, 2010
M76 as a Stereo pair 3D
Parallel vision 3D

Cross vision 3D
Other 3D-formats:
Original 2D-image with the technical details:
Closeup stereo pairs

Parallel vision 3D

Cross vision 3D
NOTE! This 3D-study is a personal vision about forms and shapes, based on some known facts and an artistic impression. Viewing instructions at Right hand side menu.
Thursday, November 24, 2011
Grande mosaic of Cygnus as an anaglyph Red/Cyan 3D
3D-NOTE!

You'll need Red/Cyan Eyeglasses to be able to see images as 3D.If you have a Red and Blue filters, you can use them! Red goes to Left eye.

Note how dark nebulae are shadowing emission ones.
 Vertical composition

Other 3D-formats:
http://astroanarchy.zenfolio.com/f359296072Original 2D:
http://astroanarchy.blogspot.com/2011/11/cygnus-project-grande-finale.html

NOTE, this is a largish file, 1400x1950 pixels and 2,8 meg.

Ps.
An anaglyph 3D-image from the "Cirrus area", of this mosaic, can be seen here:
Stereo pairs from "Cirrus of Cygnus", Parallel & Cross vision:
NOTE! This is a personal vision about forms and shapes, based on some known facts and an artistic impression.
Friday, January 7, 2011
IC1805 & IC1848 as a Stereo Pair 3D

Parallel vision 3D

Cross vision 3D
Other 3D-formats:
Original 2D:
NOTE! This is a personal vision about forms and shapes, based on some known facts and an artistic impression.
Stereo 3D "Zoom in"

Parallel vision 3D

Cross vision 3D
Subscribe to:
Posts (Atom)


